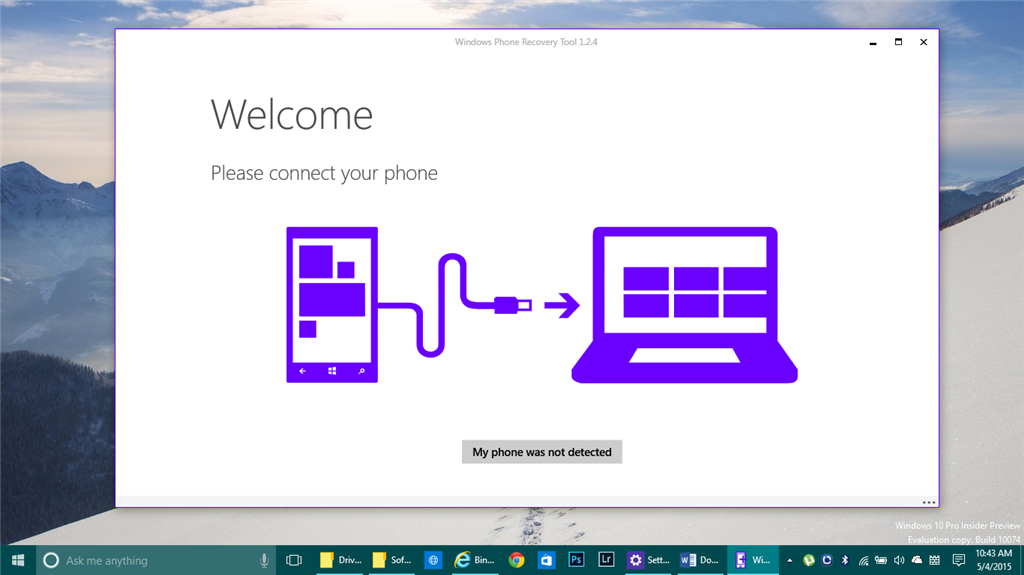
1. Download and Install Windows Phone Recovery Tool (now Windows Device Recovery Tool). (No need if you have already installed it.) Note: this is for the Lumia 520 only as the downloadable hex file is only intended for this phone model. Proceed at your own risk. There's no harm in trying. For Red Screen Bug, proceed to Step 15 (Check second line of Step 6 and 7 as a prerequisite to 15).
Update 12/29/2015: In Red Screen you also use WDRT if it can detect your phone. Thanks to Sanket RJ Dave for the tip.
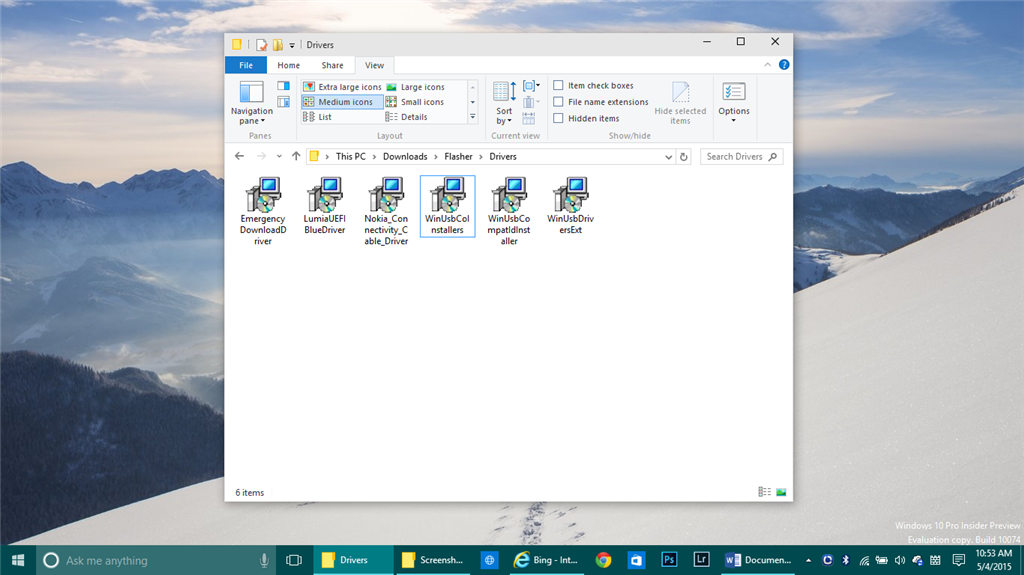
2. Install the following drivers just to be sure. Some of them might have already been installed with WPRT. Just cancel the installation if it’s already there. Download here.
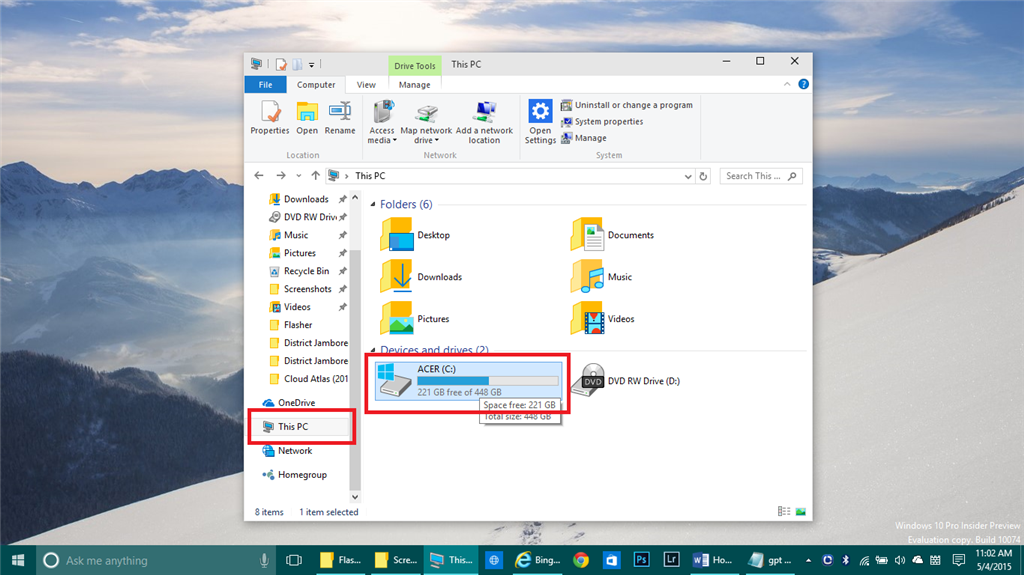
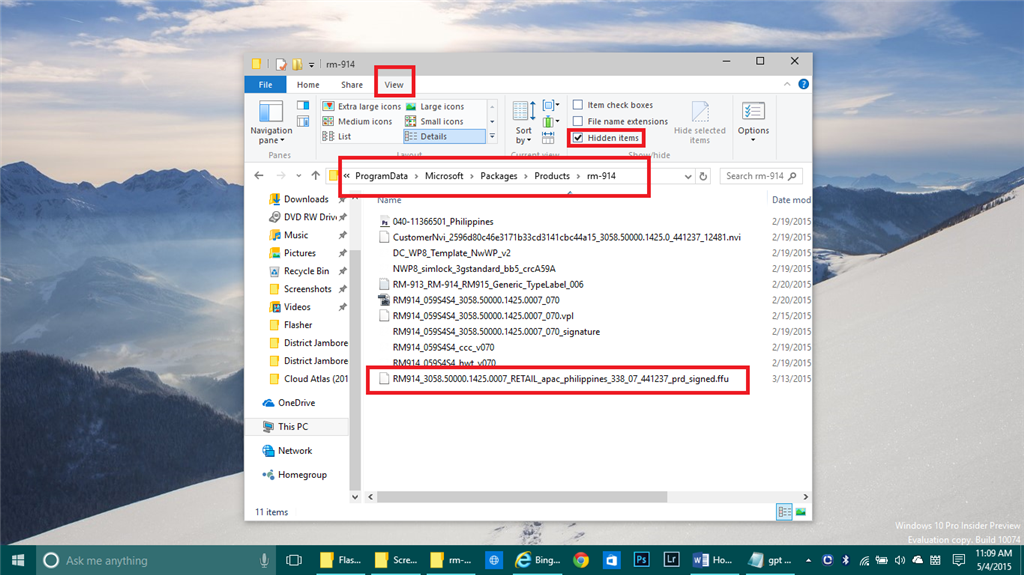
3. If you’ve downgraded your Lumia using WPRT before it got bricked, the ffu file is already there. This is the phone installer that you need. To locate it, hit Windows Key + E then, click This PC on the navigation pane and go to C drive [mine is ACER (C:)].
4. Click View Tab then tick Hidden Items and go to ProgramData\Microsoft\Packages\Products\rm-914 and you will see the ffu file that’s more than 1 GB in file size.
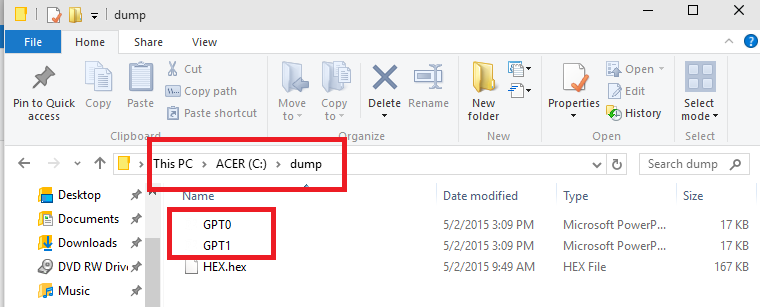
5. Now, let’s create a new folder in C drive and let’s name it dump.

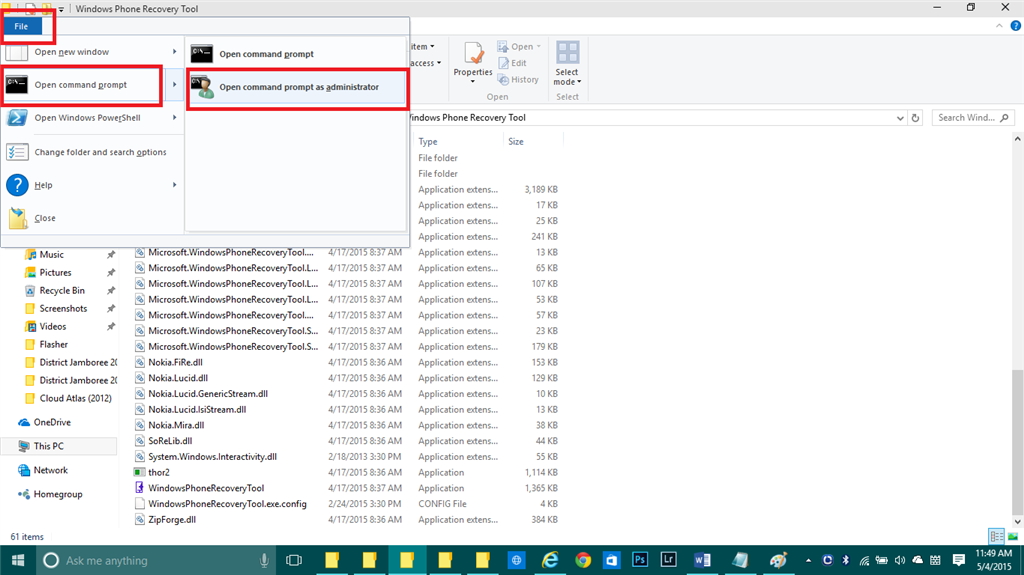
6. Download the hex file here (520 only)and place it in the dump folder. Next, we are going to locate the folder where WPRT is installed. Go to C:\Program Files (x86)\Microsoft Care Suite\Windows Phone Recovery Tool. Scroll down to check for thor2 as this will be needed to create 2 gpt files.
Update 12/29/2015: Download the complete hex files here and try to experiment to find the right one for your phone model (specifically Nokia only).

7. In that same folder click the File tab, then open Command Prompt as an administrator.
8. Enter the following command line: thor2 -mode ffureader -ffufile "C:\ProgramData\Microsoft\Packages\Products\rm-914\RM914_3058.50000.1425.0007_RETAIL_apac_philippines_338_07_441237_prd_signed.ffu" -dump_gpt -filedir C:\dump\ (don’t hit Enter yet)
9. Change the string name in italics using your own ffu filename in Step 4. Right-click on the ffu file, click Rename, hit Ctrl + A, Ctrl + C, then paste it after rm-914\ in the Command Prompt. Hit Enter and it will generate two gpt files in the dump folder.
10. Connect your phone to your computer using the included micro USB. In the system tray, it should be detected as QHSUSB_DLOAD.
11. Let’s flash the bootloader using the following command line: thor2 –mode emergency –hexfile C:\dump\HEX.hex –mbnfile C:\dump\GPT0.bin –orig_gpt
12. Wait for the process to finish (this will show up in the command prompt: C:\Program Files (x86)\Microsoft Care Suite\Windows Phone Recovery Tool> once it’s finished) Do not close Command Prompt window.
13. On your phone, hold Volume Down + Power and your phone should vibrate. It will boot in Red Screen. Don’t worry. That’s okay because right now you have a live phone!

14. The Black Screen thing can drain your phone’s battery in a day and it will not charge in that mode. Charge your phone for at least 1 hour because it requires a lot of battery juice when flashing the phone. Or if you have a spare Nokia 5230, you can charge the battery there since they both have the same battery type. (It’s okay to remove the battery in your Lumia phone in Red Screen.)
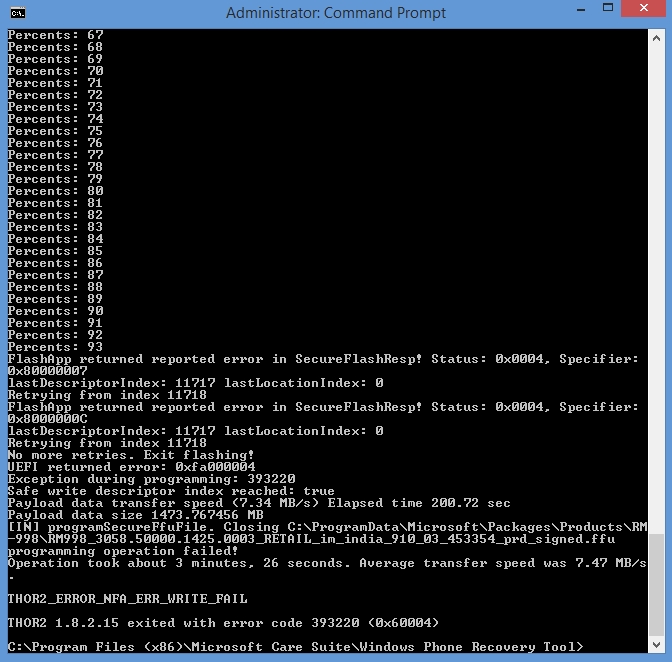
15. After charging, return the battery and connect the phone’s USB to your computer. Go back to Command Prompt and enter the following: thor2 -mode uefiflash -ffufile "C:\ProgramData\Microsoft\Packages\Products\rm-914\RM914_3058.50000.1425.0007_RETAIL_apac_philippines_338_07_441237_prd_signed.ffu" replacing the italicized text with your own ffu filename (see Step 4). The phone will begin flashing, wait until it successfully reaches 100%. If it fails, just remove the battery and repeat step 15.
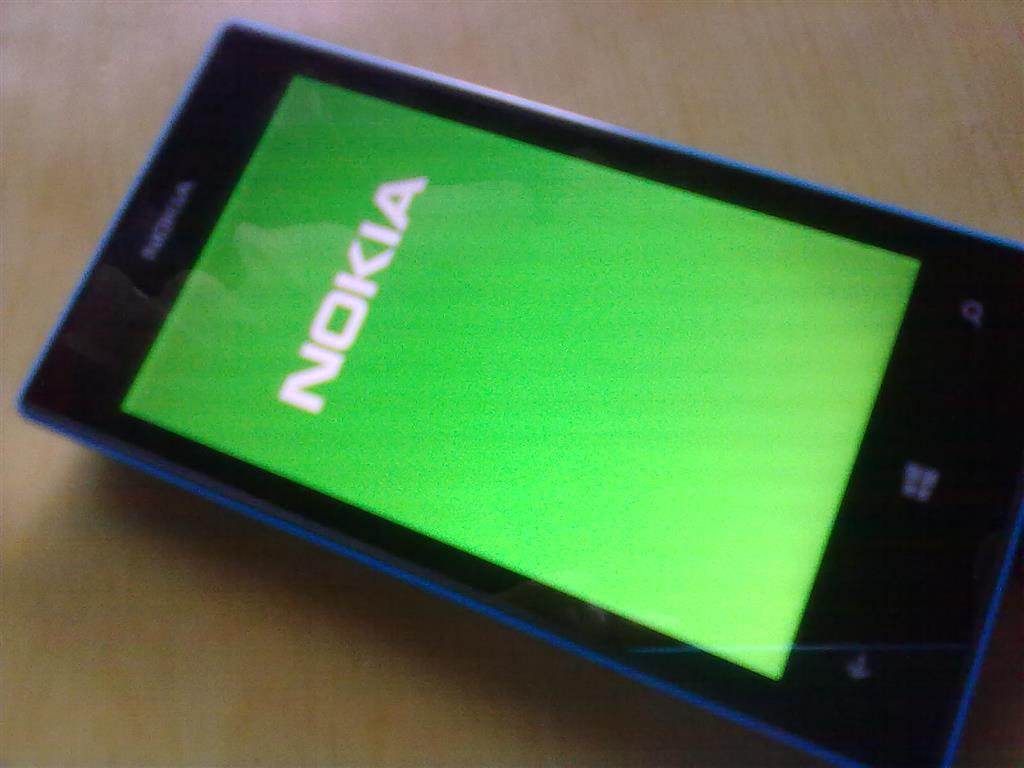
16. Your phone will restart and should now boot in Green Screen.
17. Lastly, enter the command line: thor2 -mode rnd –bootnormalmode. If you get it right, you will get these last two lines in CMD:
Device is already in the normal mode. (NCSd running)
Exited with success
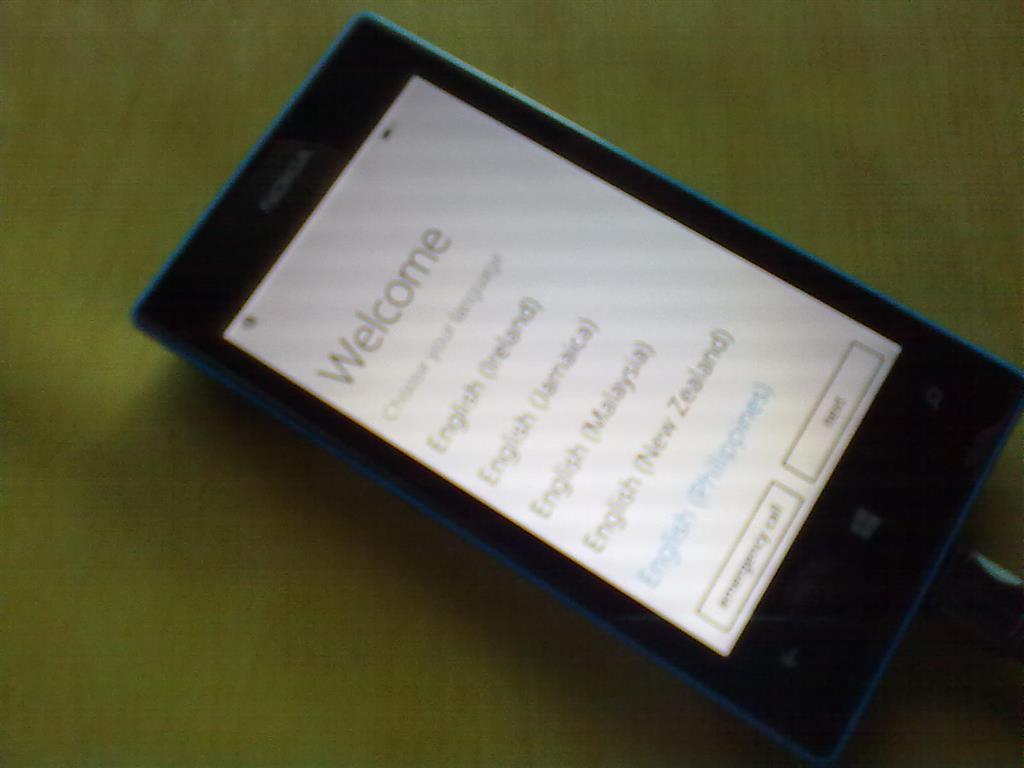
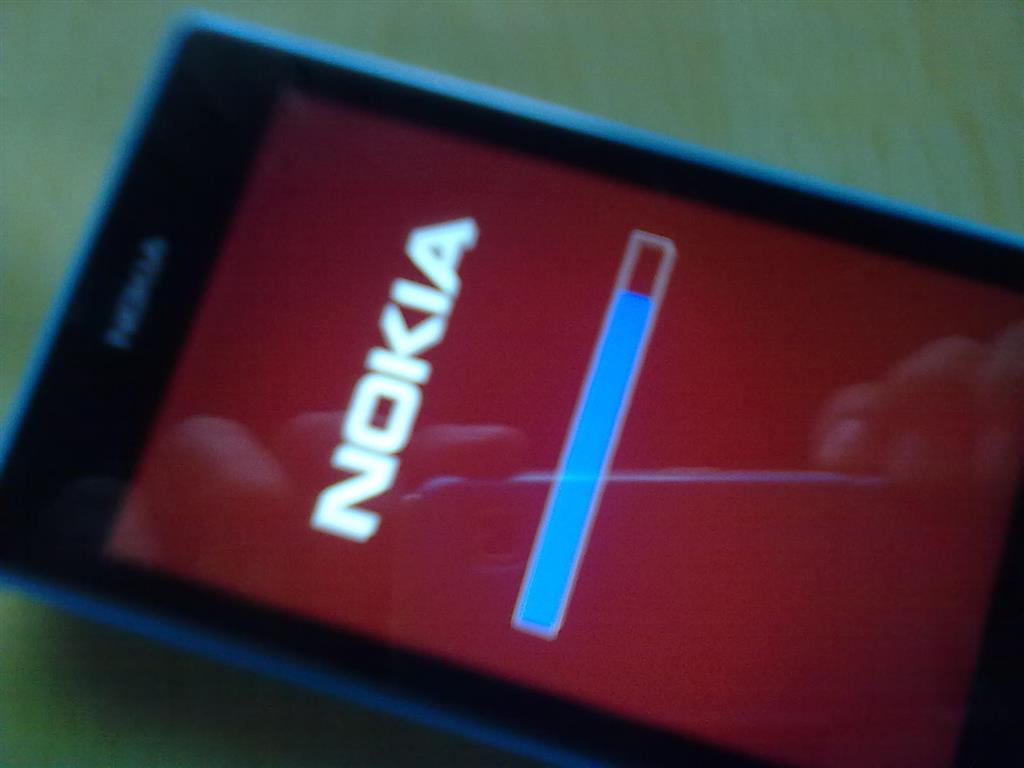
Your phone will reboot with the Nokia logo and it won't take long before you are directed to the Welcome screen.
PS: Thanks to all Windows Insiders who posted random solutions! It took me time to digest it all but now, I fully understand. Please forgive me if some of my terminologies are terrible or wrong. That's how I understand it and I've simplified it for you. I'm just a plain teacher and not an IT expert. ;)
You can also download the PDF version.