
Summary
Later this year, many persons who evaluated the Windows 10 Previews will be making preparations to migrate to final release of Windows 10. Since its availability in early October, a lot of persons have chose to make it their default operating system. In this article, we take a look at migrating from Windows 10 Previews under a dual boot configuration, previously we looked at how to restore installations that were upgraded or migrated the Preview. Dual boot configurations is the best way in my estimation to evaluate Windows 10, an article was written showing you how to do that. Reason being, your existing version of Windows (whether that be Windows XP, Vista or Windows 7/8/8.1) is kept safe while you install Windows 10 preview on a hard disk or partition. The operating system will allow you to choose which version of Windows you would like to boot into at startup by using a boot manager.
Details
If you have been using any of the release previews exclusively for a period of time, you are likely to have accumulated data on the drive where the preview is installed. Depending on the version of Windows you are dual booting with, you will have to do a manual backup to keep that data. Tools such as an external hard disk are recommended in this scenario. If you are running Windows XP, Vista, I would recommend you copy all the personal folders to an external hard disk. The process is simple:
In Windows 10, launch File Explorer

Alternate method:
Press Windows key + R
Type: %userprofile%
Hit Enter on your keyboard
Highlight all folders within your Personal folder (Press Control + A or click Select All under the Home tab)

Click Copy on the Ribbon (Home tab)
Make sure your external hard disk is turned on and plugged in, then browse to your external hard disk and click Paste on the Ribbon (Home Tab)
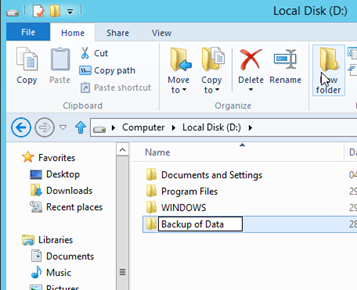
If you do not happen to own an external hard disk, but you have enough space on the boot drive where the older version of Windows is installed, you can create a folder there and paste the folders into it.
If you plan to upgrade your production installation of Windows to Windows 10 later this year, you can use File History to backup your data:
Set up a drive for File History - Windows Help
When you have upgraded to Windows 10, you can restore the file history from your external drive:
Restore files or folders using File History - Windows Help
Please note, File History might not backup some locations, a manual backup of your User Folders using copy and paste is more thorough.
Once you have backed up your data, the next recommendation I would make is to re-enable the classic text based boot manager. You can do this from within either Windows 10 or the older version of Windows. I personally recommend this as a precautionary measure, because Windows 10 uses a new graphical boot manager, I don’t know what the side effects will be if you format the partition where Windows 10 exist.
To enable the text based boot manager, right click the left hand corner of the Windows 10 screen.
or
Press Windows Key + X then Click System

Click Advanced System settings
Click Advanced tab
Under Startup and Recovery, click Settings
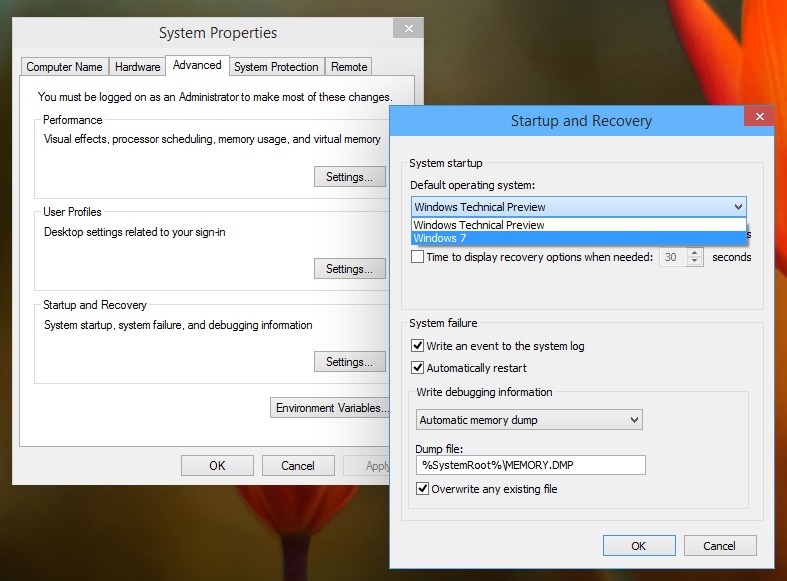
Under System startup, click in the ‘Default operating system:’ list box, select the earlier version of Windows, whether that be Windows 7 or Vista. If you are running Windows XP, select ‘Earlier version of Windows’.
Click OK
Click OK again
You should be able to select the other operating system when you start the computer.

Please note, this is the classic text based menu which require using the navigation keys on your keyboard (up or down) then hitting Enter.
Formatting Partition, recovering disk space
The next step is to boot into the earlier version of Windows “XP, Vista or Windows 7/8/8.1”.
Windows 8/8.1 and Windows 10 users:

Press Windows key + X on your keyboard and click Disk Management.
Windows 7/Vista users:
Press Windows key + R on your keyboard, then type: diskmgmt.msc or
1. Click Start > right click ‘Computer’ > click ‘Manage’. This will load the Computer Management MMC (Microsoft Management Console) snap-in.
2. In the left pane under ‘Computer Management (Local)’, expand ‘Storage’ and select ‘Disk Management’. Here you will see a collection of volumes, the amount will vary depending on how many you created, you might also see a volume created by the manufacturer of your computer. That volume will most likely have tools to reinstall the operating system and return it to its factory state. In my case, I have two partitions:
1. (C:)
2. WIN10 (G:)
I want to format the partition where Windows 10 is installed, since I backed up any critical data I might have stored on it to the (system drive) or moved data to an external drive, I am ready to format.
3. Select the logical partition on which Windows 10 is installed, right click the volume, on the contextual menu, click the ‘Format’, option. You will receive a Warning dialog, click OK to continue.
4. The next step is to select your file system option, in this case, go with the default which is NTFS.
5. The formatting process will now begin. The time it will take to format will vary depending on resources such as processor, memory and the size of the partition itself.
6. Once complete, the drive will be displayed as a ‘Logical Drive’ in Disk Management.
Lets take it a step further. I would like to merge back that free space with my system drive, here is what you do.
1. Right click the ‘Logical Drive’ in Disk Management, on the contextual menu, click the ‘Delete Volume’ option. Click ‘Yes’ when the warning dialog appears.
2. The Volume you deleted will now appear as ‘Free space’, you will also notice that the disk icon no longer appears in the list of volumes.
3. Right click the Free space partition, and click Delete, click Yes on the Disk Management warning that appears.
4. The volume will now appear as Unallocated. Our next step is to merge back that unallocated free space with the system partition. Right click the System volume and click the ‘Extend Volume’ option on the contextual menu, click ‘Yes’ when the warning appears.
5. A wizard will now begin that will guide through the steps to merge back the unallocated space with your system partition.
Extending your volume wizard (click image to enlarge)
The above wizard provides a simple procedure to merge back the unallocated space in second screenshot above with system drive. Once you have selected the space, click Next, at the end of the wizard, you will see the amount allocated.
The partition will now be displayed as a single drive.
Using Easeus in Windows XP to reallocate partition space used by Windows 10
In the Easeus main screen, right click the system partition (C:\)

Click Resize/Move partition

Under Decide size and position, drag the knob to the right until there is none left. See pic below:

Click OK
Click Apply to confirm changes

Click Yes when Apply Changes dialog appears.

Click OK when complete
Restart your computer to complete changes.
You should now have a single partition displayed in Computer Explorer.
Automatically boot into the operating system.
Earlier, we had enabled the text based boot manager.
Because we no longer have Windows 10 installed, we need to remove it.
Click Start, right Computer (My Computer for XP users)
Click Properties (Windows 7/Vista users click Advanced system settings)
Click Advanced tab
Under Startup and Recovery, click Settings
Under System startup, uncheck ‘Time to display list of operating systems’
Click OK, then Apply and OK
This will allow you to boot directly to the Windows 7, Vista or XP desktop.
Related:
How to dual boot the latest Windows build with previous versions of Windows