
Summary
If you have just upgraded to Windows 10 from Windows 7 or Windows 8.1 you will discover that you only have
30 10 days from the time you upgraded in which to recover your previous version of Windows.
Here is how you can go beyond 30 10 days and still go back.
Note: On November 7th (92 days after upgrading to Windows 10) I tested going back to Windows 7.
It worked as I was able to restore Windows 7 and install all the Windows 7 updates released from August, Sept. and October.
Details
30 days may not be enough time to evaluate Windows 10 especially if you have long work hours, family commitments during the weekends and other activities that limit the time you have on your PC.
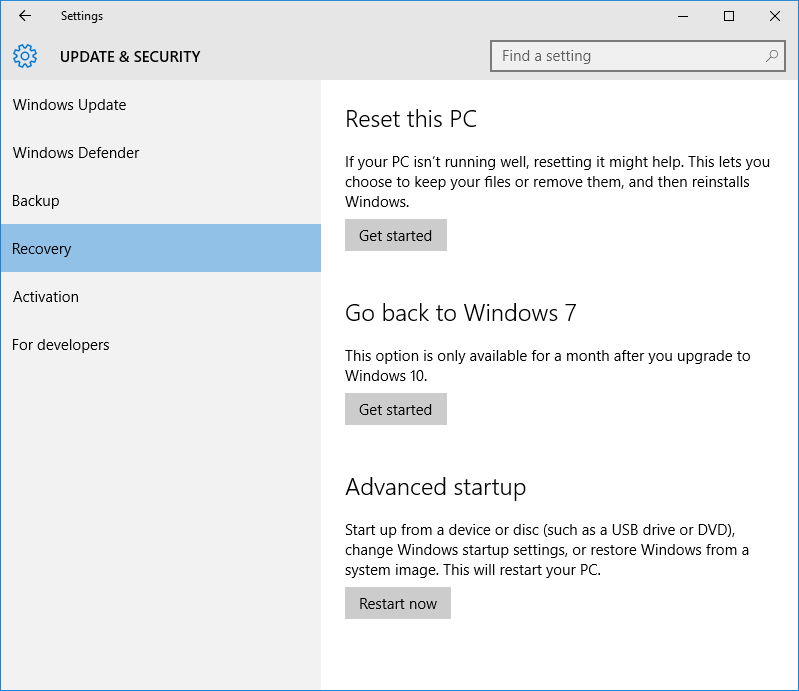
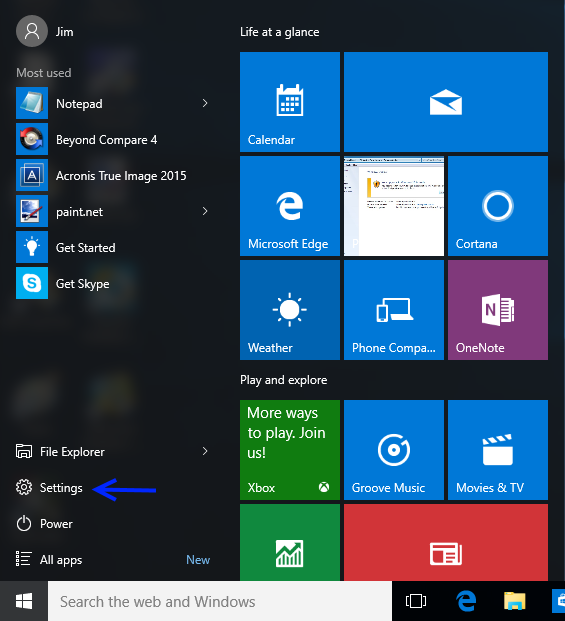
Click Start / Settings / Update and security / Recovery
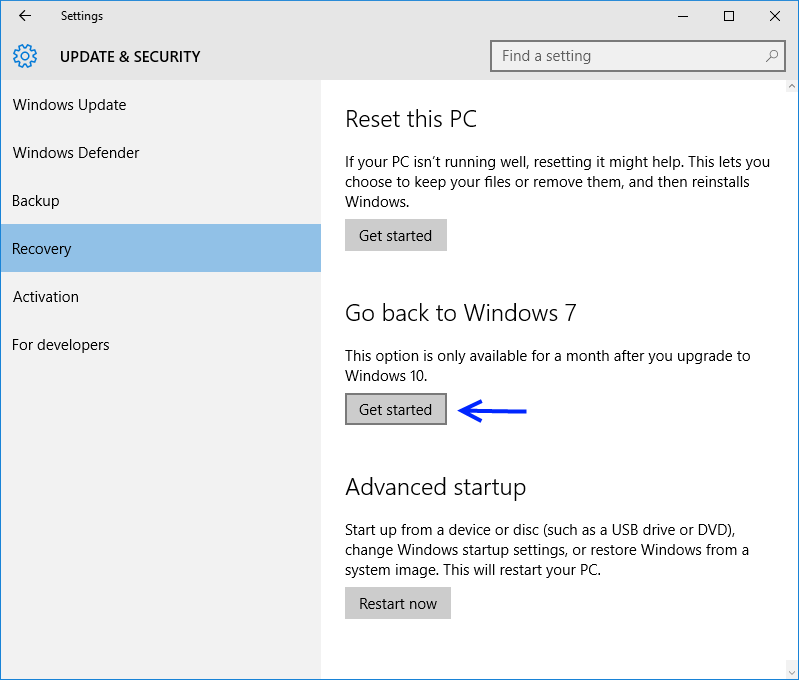
Notice the ‘Go back to Windows 7 (or Windows 8.1) option. After 30 days this option will no longer exist.
Just follow these instructions to get more than 30 days to evaluate Windows 10 and still be able to recover / roll back to your previously installed version of Windows 7 or 8.1
You need to make the changes described below now, don’t wait until the 30th day as it may too late.
Note: If you have installed the Threshold 2 (Windows version 1511 aka Build 10586) update see the instructions in part 2 (only applies if you already had the original version 10.0 which was release on July 29th, 2015 already installed) otherwise if you have just recently upgraded to Windows 10 from Windows 7 or 8.1 within the last 30 days perform the steps listed in part 1.
What version of Windows 10 do I have installed?
In the Cortana / Search box enter: winver
The best match should be a run command named winver. Click on the ‘run command’ option and the “About Windows” box will display both the version number and OS Build number).

Part #1:
Start by launching File Explorer (manila folder on the toolbar), and select the ‘Local Disk (C:)’ drive partition. Now click on the ‘View’ tab and select the ‘Details’ option. Now place select and place checkmarks in the ‘File name extensions’ and ‘Hidden items’ boxes.

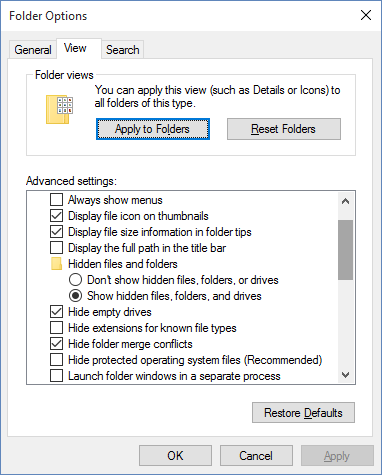
Next near the right end the bar there is an ‘Option’ tab, click on it and click the ‘Folder Options/ View tab. Now select ‘Show hidden files, folders and drives’, remove the check marks from: ‘Hide extension for known file types’ and 'Hide protected operating system files’.

Click the ‘Apply’ and ‘OK’ buttons
You should now see a number of addition files located at the root (C:\) level of the disk drive. Two of these folders must be renamed to protect them from being deleted 30 days after you have upgraded to Windows 10.

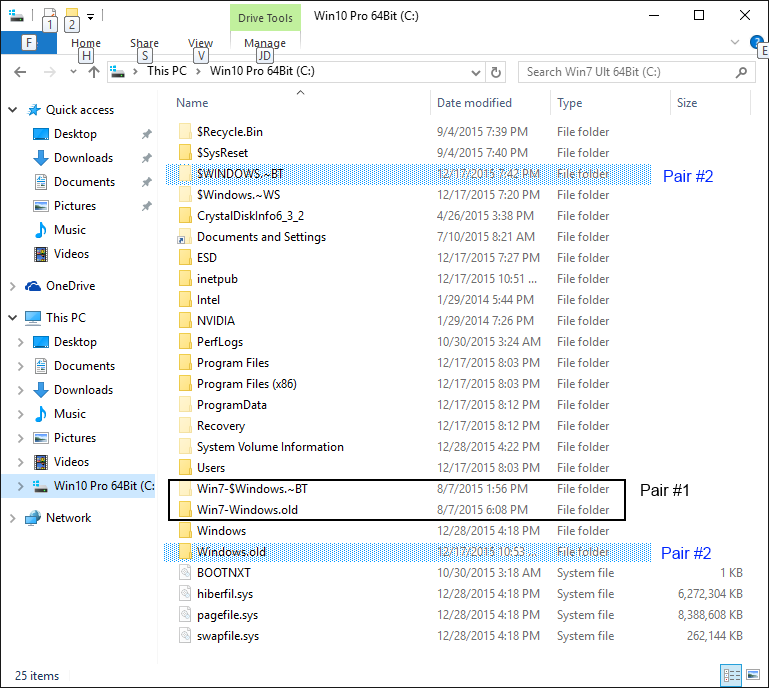
In File Explorer right click on C:\$Windows~BT and rename it to Win7-$Windows~BT (or Win81-$Windows~BT). Next right click on the C:\Windows.old folder and rename it to Win7-Windows.old (or Win81-Windows.old). When you have finished renaming these two folders you should see the following.

Now you are all set to continue using Windows 10.
Note: If you have Image Backup software installed make a backup of Windows 10 after you have renamed the 2 folders. When and if you choose to recovery / roll back to Windows 7 or 8.1 should something go wrong with the rollback process just restore the backup and try again.
Part #2
You already had the original release of Windows 10 installed after having upgraded from Windows 7 or 8.1 and you previously followed the instructions listed in part 1 within less than 30 days after upgrading to Windows 10. Now you find that the Threshold 2 update (Windows 10 version 1511 / Build 10586) has been installed and there is a new Windows.old folder in addition to the one you renamed in part 1.
If you haven’t already done so, start by launching File Explorer (manila folder on the toolbar), and select the ‘Local Disk (C:)’ drive partition. Now click on the ‘View’ tab and select the ‘Details’ option. Now place select and place checkmarks in the ‘File name extensions’ and ‘Hidden items’ boxes.

Next near the right end the bar there is an ‘Option’ tab, click on it and click the ‘Folder Options/ View tab. Now select ‘Show hidden files, folders and drives’, remove the check marks from:
‘Hide extension for known file types’ and ‘Hide protected operating system files’.
Click the ‘Apply’ and ‘OK’ buttons
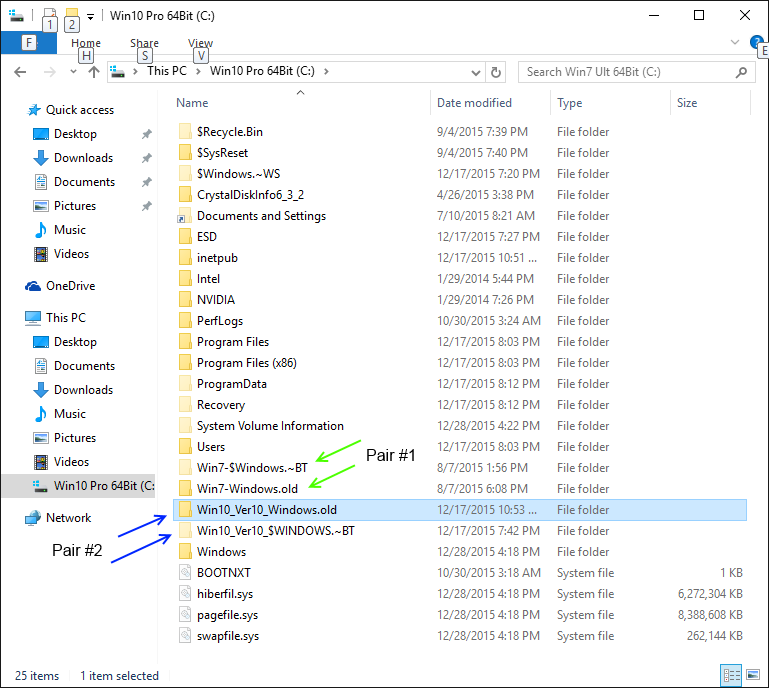
You should now see a number of addition files located at the root (C:\) level of the disk drive. Two of the folders (Win7-Windows.old and Win7-$Windows~BT) you already renamed to protect them from being deleted 30 days after you have upgraded to Windows 10. You also see 2 new folders as the result of installing the Threshold 2 upgrade (Windows.old and $Windows~BT). You must rename these folders using the same technique described in part 1, only this time the names will be Win10_Ver10_$Windows~BT and Win10_Ver10_Windows.old.
Once you have renamed these folder you will have 2 sets of renamed folders as shown below. The 1st set with the Win7 prefix contain the files and folder you need to roll back / restore Windows 7 (or 8.1) and the new set (pair #2) with the Win10 prefix.
Note: If you fail to rename the second pair of Windows.old and $Windows~BT folders before the 30 day time limit and as a result these two folder are deleted then you will no longer be able to use the original set of folders (pair #1) you renamed short after upgrading to Windows 10. Once pair #2 has been deleted, it does not matter if you remove the Win7 (or Win81) prefix to restore the original pair of folder names the roll back option will not be listed.
What causes these 2 folders (Pair #2) to be deleted is a scheduled task set to run Disk Cleanup (with the ‘Clean up system files / Previous Windows installations options’ selected) 30 days after the upgrade to Threshold 2 (version 1511) or the next major update after version 1511.
Once renamed as shown below the second pair (Pair #2) will prevent the deletion and allow you to roll back to Windows 7 or 8.1 per the instructions in Part #3 of this article.
Part #3
If you finally decide you want Windows 7 or Windows 8.1 back on your computer do the following:
Note: Plan to allow yourself enough time to complete the instructions listed below without interruption. Laptop users should also connect to an AC power outlet before you start as this could take an hour or more.
Backup any new data files to external media (USB Flash drive for example) you may have created while using Windows 10 in case they need to be restored after the process has completed.
Start by renaming the original 2 folders (pair #1) back to their original names which are $Windows~BT and Windows.old

Now you should see the following:

Next click Start/Settings
Click on: Update & security

Click on the Recovery option and then click on the ‘Go back to Windows 7 (or 8.1)’ Get started button.
Note: If the ‘Go back to Windows 7 (or 8.1) option is not listed then skip to Part #4 to access the ‘Go Back’ option and continue with the steps listed below.
Part #3b
Select the option that best describes why you are going back. The text box at the bottom is optional, but can provide useful information to Microsoft as to why you don’t want to continue using Windows 10. Click the ‘Next’ button to continue.

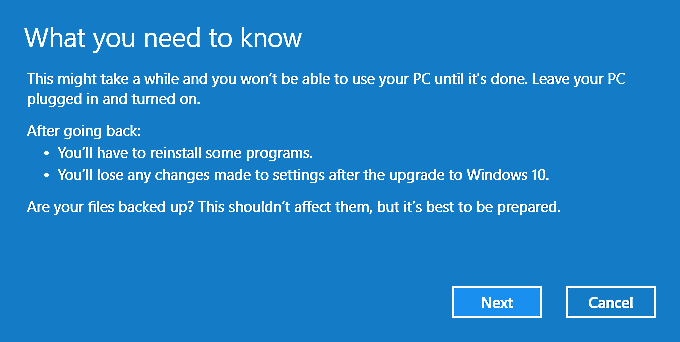
Read the warning messages and if you still want to continue click ‘Next’.

Click on the ‘Go Back to Windows …’ button to start the actual recovery / roll back process.


Log into Windows 7 or 8.1 using the password you used with 7 or 8.1

After the recovery / rollback process has completed open Windows Explorer (File Explorer in Windows 8.1) and check the contents of the C: partition. You will notice the Windows.old folder has been deleted.

That’s it, you’re done.
You may notice the GWX icon in the right hand side of the taskbar. You can use this to re-install the free version Windows 10 anytime within 1 year from July 29th, 2015.
Part #4:
Alternate means of accessing the Roll Back / Go Back to previous version option.
You have two ways of accessing the alternate method, both involve using the Power/Reset option.
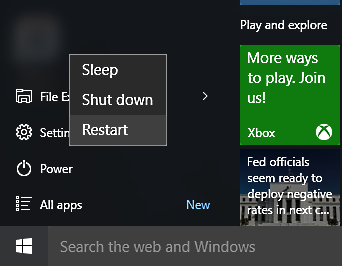
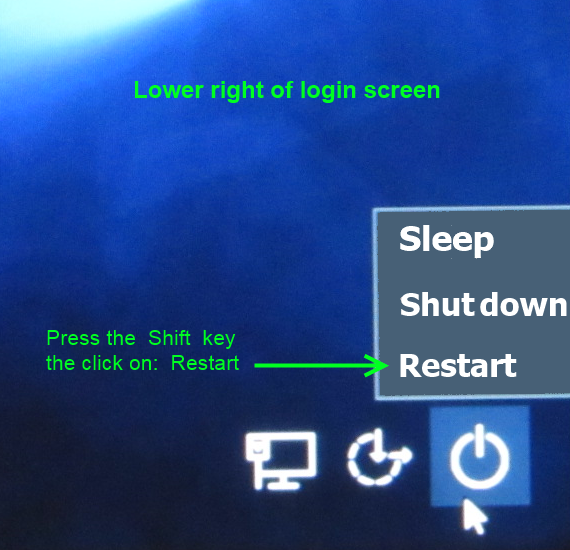
A) From within Windows 10 click the ‘Start’ menu, select the ‘Power’ option and the hold down the ‘Shift’ key and click on the ‘Restart’ option.
B) After powering on the computer and before you enter your password click on the ‘Power’ button icon located in the lower right corner of the display, hold down the ‘Shift’ key and then click on the ‘Restart’ option.
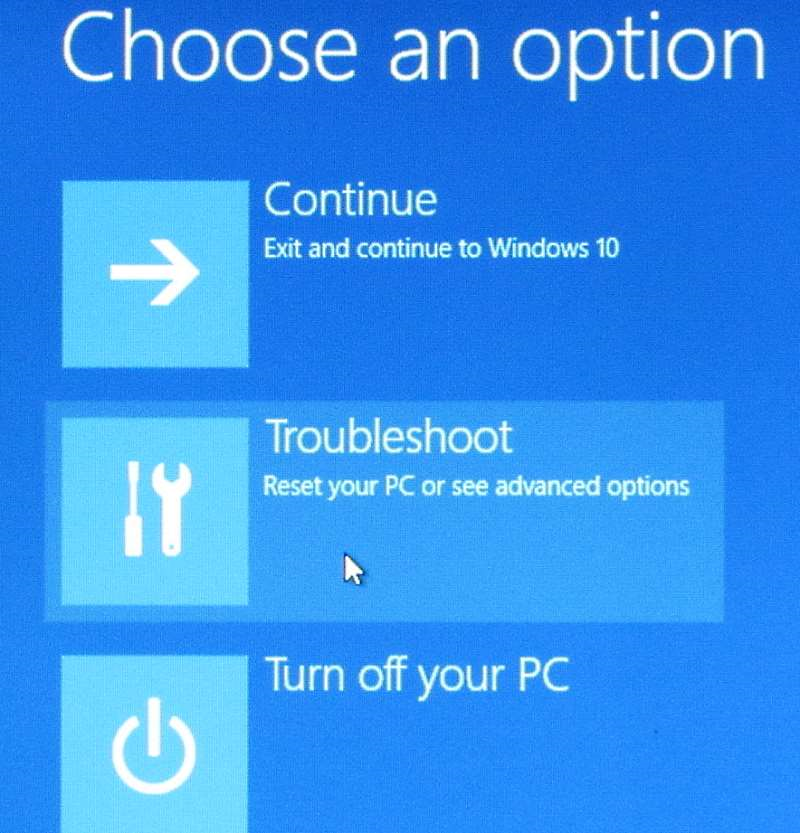
Your computer will reboot, choose your account name and password to continue and then you should see the GUI Boot Menu when the computer restarts. Click on the ‘Troubleshoot’ option.
Next click on ‘Advanced options’

Now click on the ‘Go back to Windows 7 / 8.1’ or previous build option. The restoration / roll back process will start by rebooting your computer after which you will be prompted to choose an account (use your Windows 7 account and password if you created a new account while you using Windows 10).

After you enter your password you will have the option to either ‘Go back to previous build’ which will restore Windows 7 or 8.1 or ‘Cancel’ the recovery / roll back and return to Windows 10.

Reference material: http://www.pagestart.com/win10extrb08141501.html
Additional Wiki articles you may want to read:
Windows 10 - What type of product key do I have?
How to get the Windows 10 Free upgrade has been made even easier
Threshold 2 Update - Still waiting for the update, how to get it installed now

