
Summary
The computer remains a central hub in our digital lives. We use it to manage a lot of things including finances, digital media such as photos, music, finding and storing information, creating content such as documents, presentations and all sorts of other productive tasks. Windows 10 as much as it may seem different, is still familiar and easy to use in many ways. A lot of persons have been asking about importing photos onto their Windows 10 device or PC. The procedure is exceptionally easy to do so I decided to prepare this article to show you how to import them, whether it’s a traditional point and shoot digital camera, a smartphone such as the iPhone, Windows Phone or even an Android device.
Details
Digital Camera
-
You need to have a USB Cable if you want to import directly from the camera. The cable should have been included in the box that came with your digital camera. If you don't have a USB cable, see instructions further down in this article for you can use the SD card in your camera.
-
Connect the cable to the micro-USB port then insert the USB male end into the USB port on your computer.
-
Make sure the camera is turned on.
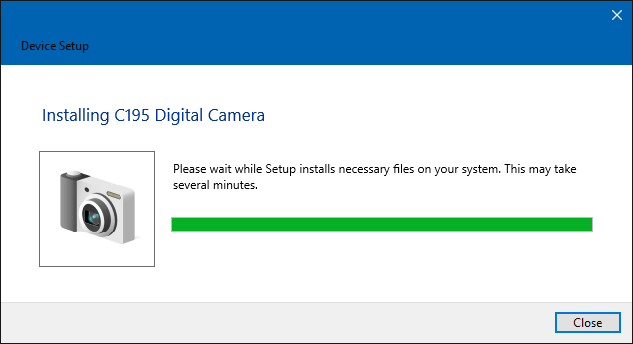
If this is the first time you are connecting your digital camera to your computer, Windows 10 might need to initialize it and install appropriate drivers.
Importing Pictures and Videos wizard
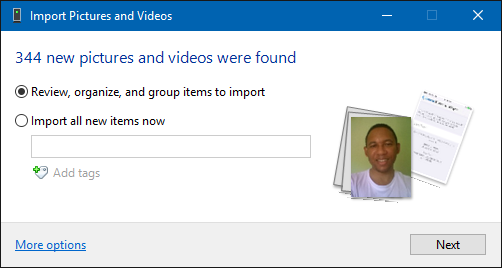
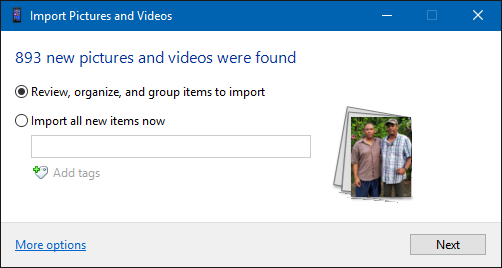
If you are accustomed to importing photos using the Import Pictures and Videos wizard, you can still do so in Windows 10. Click Start > File Explorer > This PC. You should see the camera appear under Devices. Right click it then click Import pictures and videos.

This will start the Camera import wizard. Go with the default option then click Next.

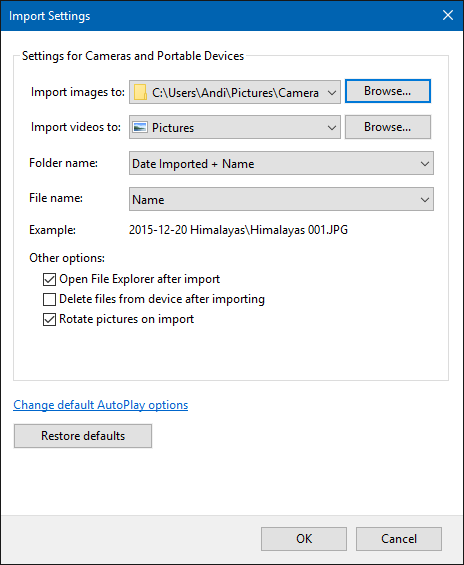
If you want to customize where Photos and Videos are stored, click More options at the bottom left corner. Click Browse then choose where you want your photos and videos to be stored automatically.
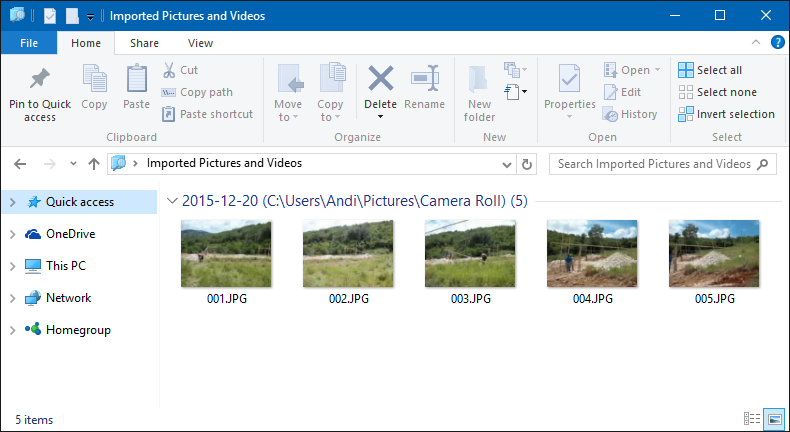
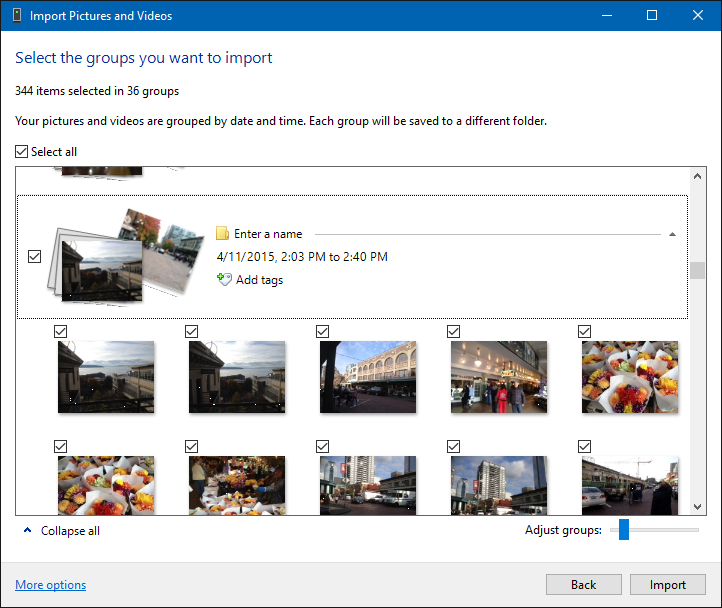
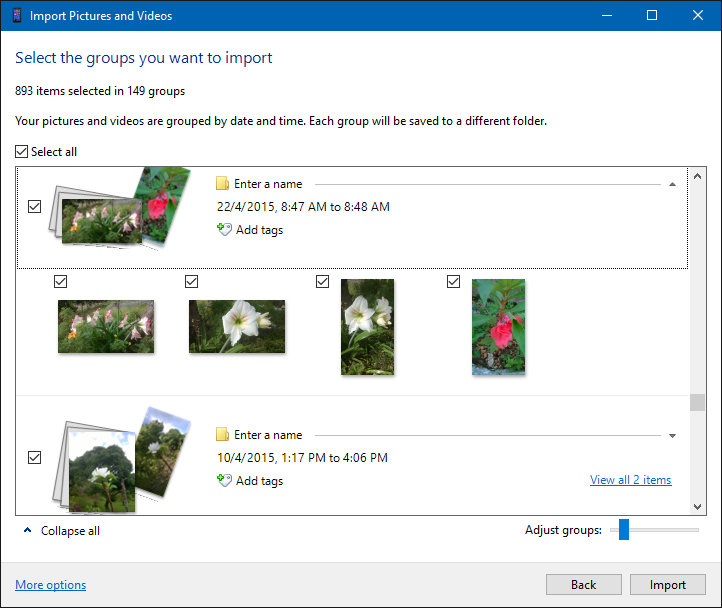
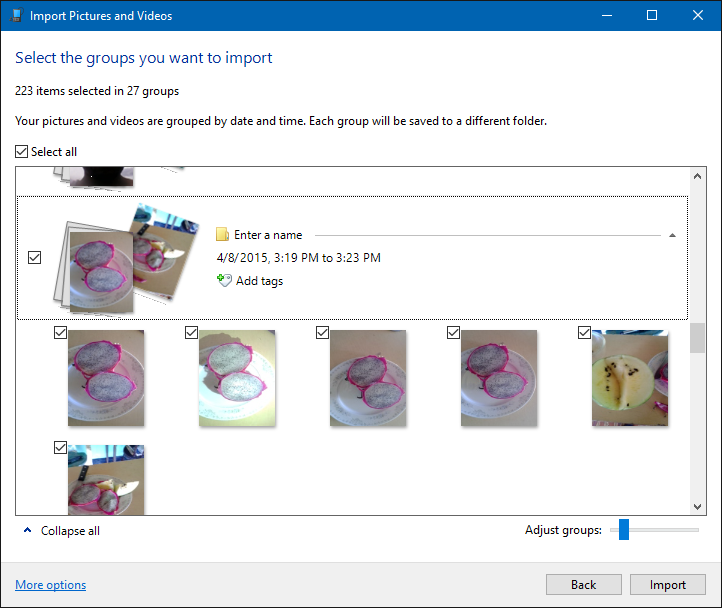
The Camera wizard displays your photos in groups according to date and time. You can click Enter name field then enter an appropriate name. You can also uncheck groups and just keep the ones you want to import.
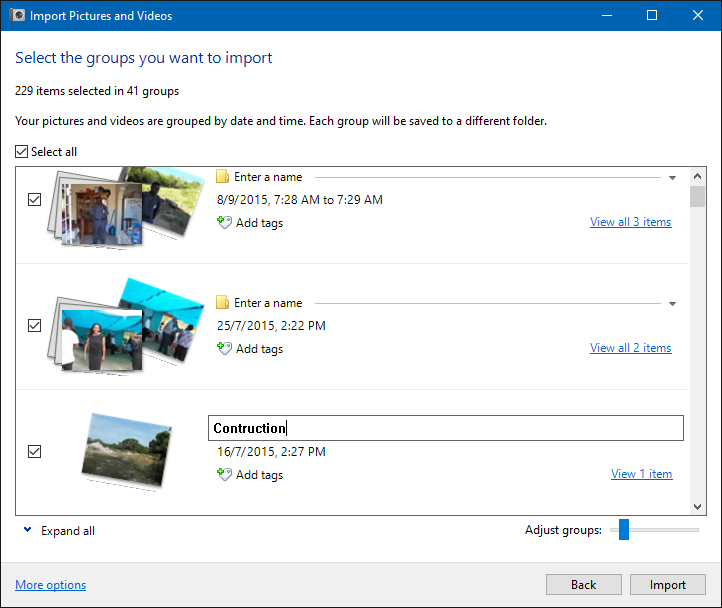
Once you have selected the groups you want to import, click Import

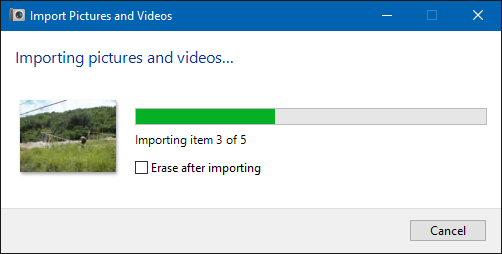
Wait while your pictures and videos are imported. You have the option to erase them from the camera the same time.
When the Import is complete, your photos will be presented to you in File Explorer.
Import Photos and Videos manually using File Explorer
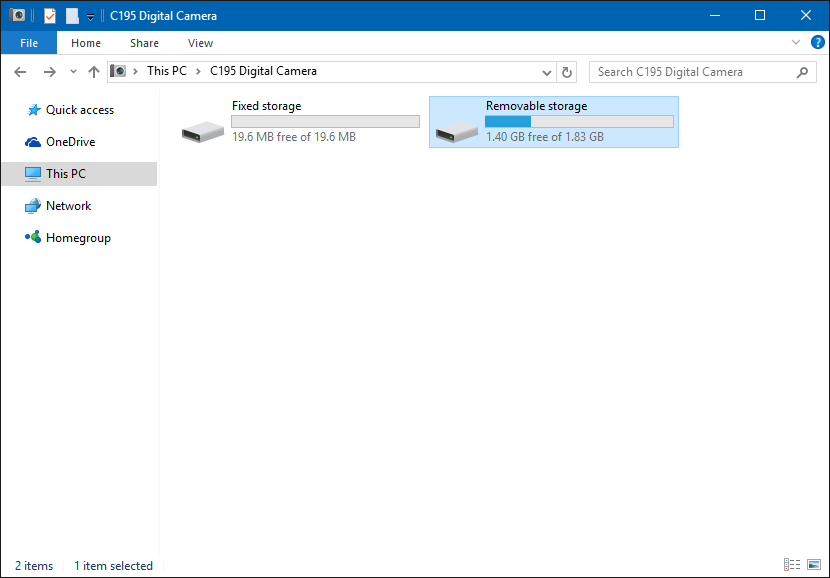
You can import photos manually too. Launch File Explorer then open the Camera. Some cameras will have both fixed and removable storage. In most instances, yours will have removable, so open that.
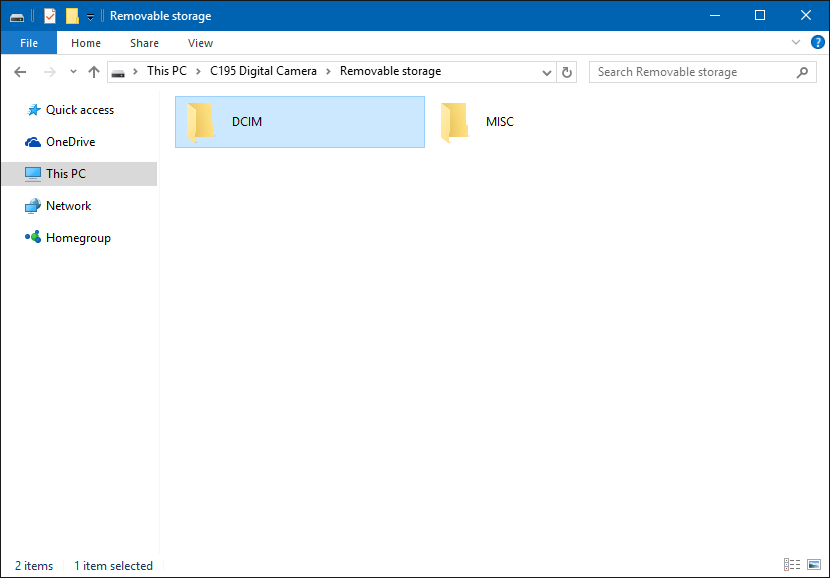
Open DCIM folder
Browse and scroll through the photos. Select the photos you want, use the Control key + mouse click to select photos. Click Copy command under Home tab or press Control key + C

Go to your Pictures folder then click Paste, you can also create a folder then paste them there.
Importing using the Photos App
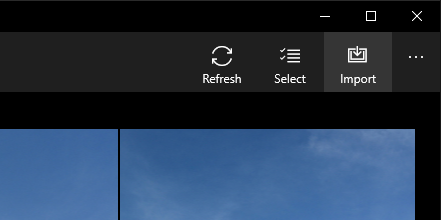
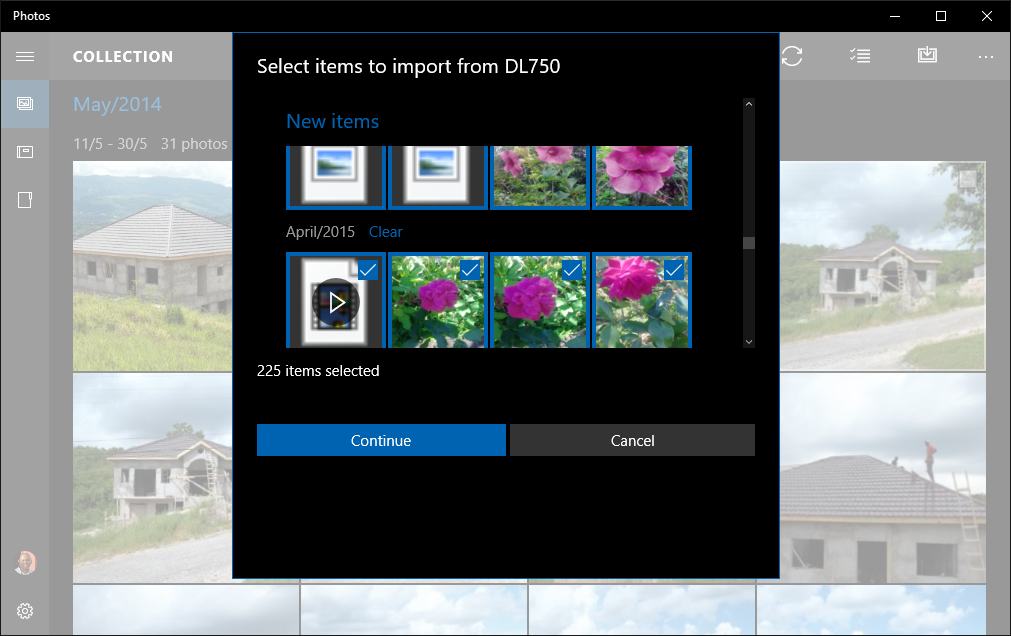
Windows 10 has a built in Photos app which you can also use to import your photos. Click Start > All Apps > Photos.
Again, make sure your camera is connected and turned on. Click the Import button on the command bar in Photos.
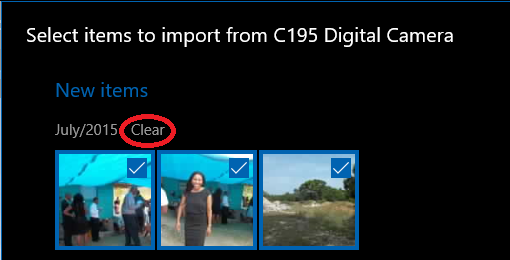
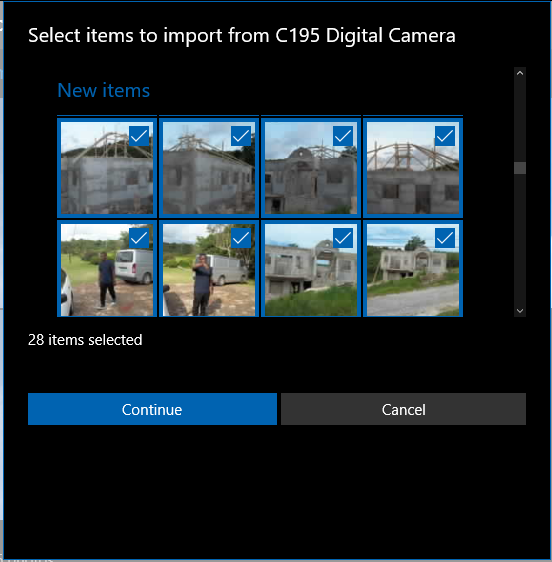
Select the photos you want to import.
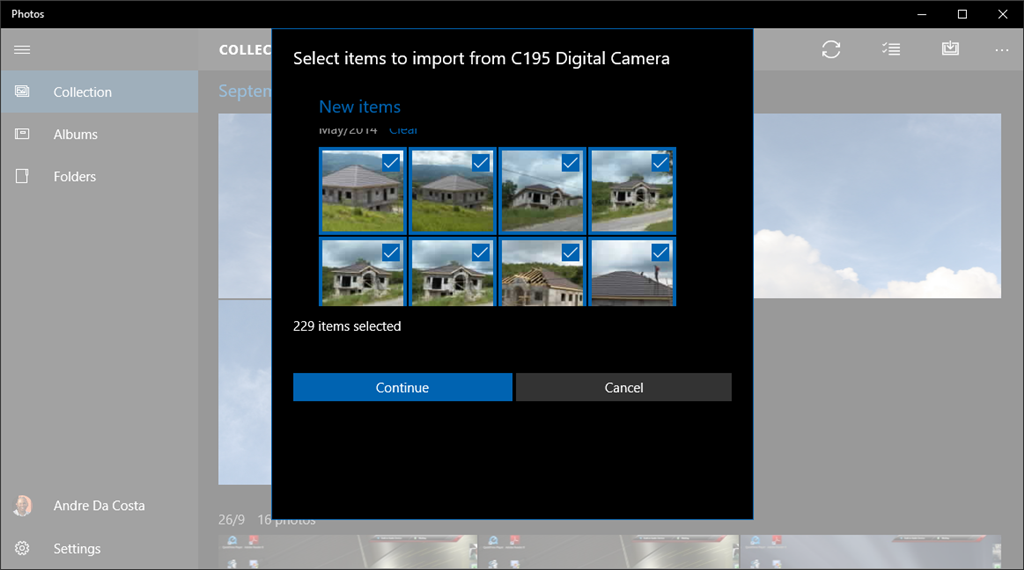
The camera wizard will present your photos according to date they were take, you can click Clear under each group then select the ones you want to import.
When you are ready to import, click Continue
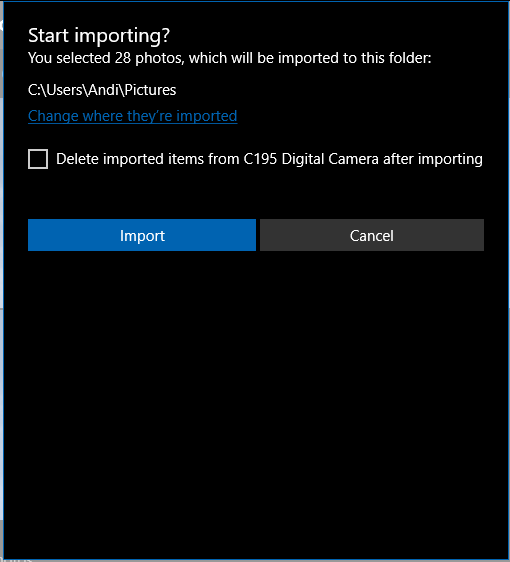
You have the option of changing where you would like to have your photos stored. Click Change where they’re imported browse and select the folder then click Add this folder to Pictures. Click Import
Your photos will now be imported.
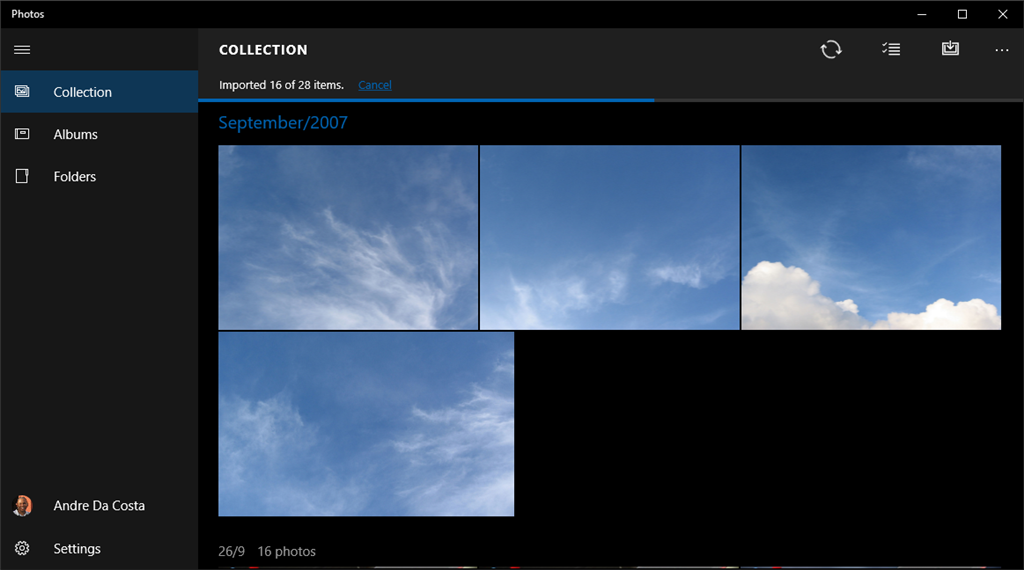
To find your photos, click the date header
Click the date the photos were taken.

Smart Phone – Windows Phone, iPhone and Android
The Smart Phone has become the most popular way we captures photo and videos these days. Just about every phone has a built in digital camera. Windows 10 makes importing your photos just as easy too.
Importing photos from a iPhone
Importing from an Apple iPhone is just as easy. Connect your iPhone using the USB cable, click Start > File Explorer > This PC. Right click the iPhone then click Import pictures and videos. This will start the Import Pictures and Video wizard.

If you encounter an error, make sure your iPhone is unlocked, meaning you need to enter a passcode or slide to unlock. Also, you might need to trust the device. Learn more here about doing that.
Once you have done so, you should now be able to import your photos.
Just like a digital camera, you can select your groups, enter a name then click import.
Using the Photos app and iPhone
You can also use the Photos app in Windows to import photos and videos from your iPhone. Simply connect your iPhone using the USB cable, ensure it is unlocked and trusted. Click Import and your Photos should show ready to be imported.

Importing photos from a Windows Phone
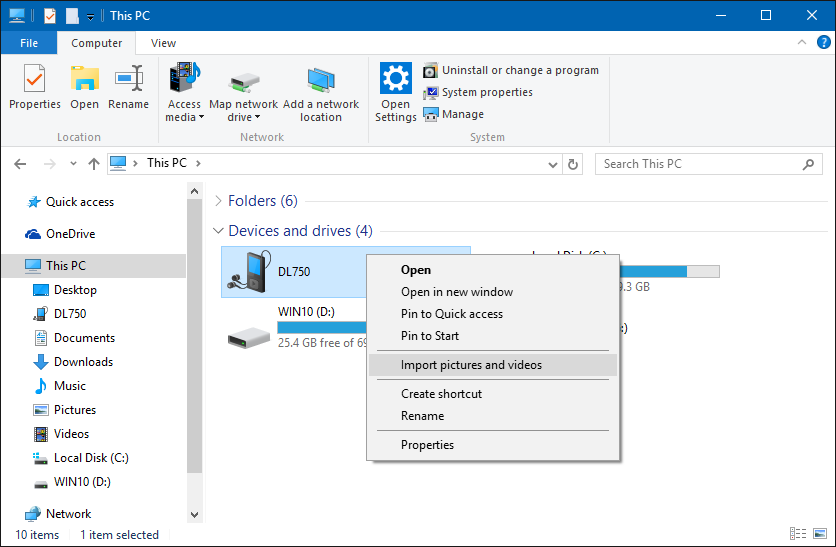
Just like the iPhone, you can also use the Camera Wizard to import your photos and videos using either File Explorer or Photos app. Connect your Windows Phone using the USB cable, click Start > File Explorer > This PC. Right click the Windows Phone then click Import pictures and videos. This will start the Import Pictures and Video wizard.
Just like a digital camera, you can select your groups, enter a name then click import.
Using the Photos app and Windows Phone
You can also use the Photos app in Windows to import photos and videos from your Windows Phone. Simply connect your Windows Phone using the USB cable then click Import and your Photos will be ready to be imported.

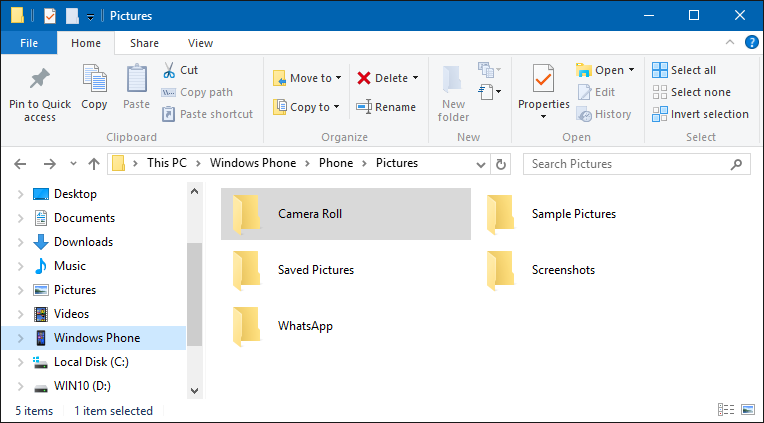
You can also browse your Windows Phone and manually copy and paste your photos. Click Start > File Explorer > Windows Phone > open the Camera Roll folder on your Windows Phone then select and copy the photos you want. Some photos might be stored in designated folders from other apps such as WhatsApp.
Importing photos from an Android device
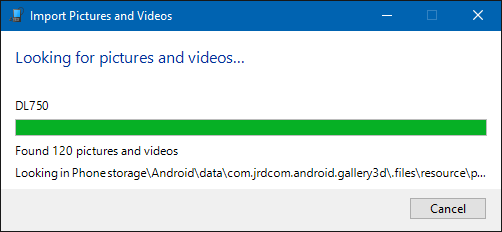
Just like the iPhone and Windows Phone, you can also use the Camera Wizard to import your photos and videos. You can also use File Explorer or Photos app to import them. Connect your Android Phone using the USB cable, click Start > File Explorer > This PC. Right click the Android Phone then click Import pictures and videos. This will start the Import Pictures and Video wizard.
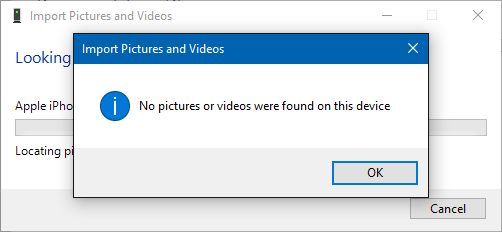
I notice the wizard takes a bit longer to find your photos, so give it a little time.
Click Next

Just like a digital camera, you can select your groups, enter a name then click import.
Using the Photos app and Android device
You can also use the Photos app in Windows to import photos and videos from your Android Phone. Simply connect your Android Phone using the USB cable then click Import and your Photos should show ready to be imported.
Troubleshooting
Now the instructions are straight forward, but problems can occur from time to time. Here are some things you can do to ensure your device works.
-
Make sure the USB cable you are using to connect the device to your computer is not loose. If the male end connecting to the female end on the device is shaky, it’s possible you might need to nudge the cable for the device to appear or you might need to change the cable.
-
Make sure the device is unlocked. If your device is locked using a passcode, you will need to unlock it so it will show up in Windows.
-
If the device does not show, restart Windows, launch File Explorer again and see if it appears.
-
If you more than one USB port, try connecting the USB cable to another USB port then see if it appears.
-
Sometimes unplugging and reconnecting will work. Check to make sure the Camera initialization wizard is working.
-
Some cameras might require a driver before they can work, it’s rare and in some cases apply only to high end professional cameras from brands such as Canon or Nikon. Check the manufacturer’s website for updated drivers normally available in the download section.
-
If your Digital camera is not appearing, again, change the cable or if your system unit has a memory card reader, remove the SD card from the camera insert it into the SD card port then click Start > File Explorer > browse the SD card and copy over your pictures.
-
If the SD card does not show up or you cannot browse or copy photos from it, make sure it is not locked.
Hopefully this guide will help get those photos onto your Windows 10 PC much easier.
Resources:
How to connect and browse your Apple devices on a Windows 10 PC