
NOTE: If your computer has a Intel Clover Trail processor, its not compatible with Windows 10 1809, 1803, 1709 or 1703. Those computers should continue to use Windows 10 1607, which will continue to receive support until January 2023.
Please be sure to follow me on Twitter @adacosta for the latest tips, tricks and updates in the world of Windows 10. -

Technical Level : Basic
Summary
Despite a free upgrade offer that lasted for one year, many users running Windows 7 skipped the Windows 10 offer. That said, computers still running the much older version of Windows can still upgrade to Windows 11 or Windows 10. I decided to create a tutorial using Windows 7. Even after several major revisions, users running even the Windows 7 RTM release can perform an in place upgrade to the latest version of Windows. The process no different from the initial release, but if you are curious to know what its like and what you can do to get that PC on the latest version of Windows, here is how you do it.
Details
If you are upgrading to Windows 11 or Windows 10 from Windows 7, as long as your installation is currently activated, you will be able to upgrade for free.
Windows 10 Free Upgrade Still Available
How to get the Windows 10 ISO.
The Media Creation Tool will be updated so you can download the latest version ISO containing the Windows 10 feature update. To learn more about how to download the ISO file, check out the following article:
How to download official Windows 10 ISO files
How to create a bootable copy of the Windows ISO.
Before you can use the Windows 10 Creators Update ISO, you need to initialize it. Whether you choose to burn to a blank DVD or copy the install files to an empty USB thumb drive. Learn how to do it:
How to Prepare Bootable Install Media for Windows 10 - DVD, USB or SD Card
For troubleshooting instructions, please scroll down further.
Upgrade to Windows 11 from Windows 7
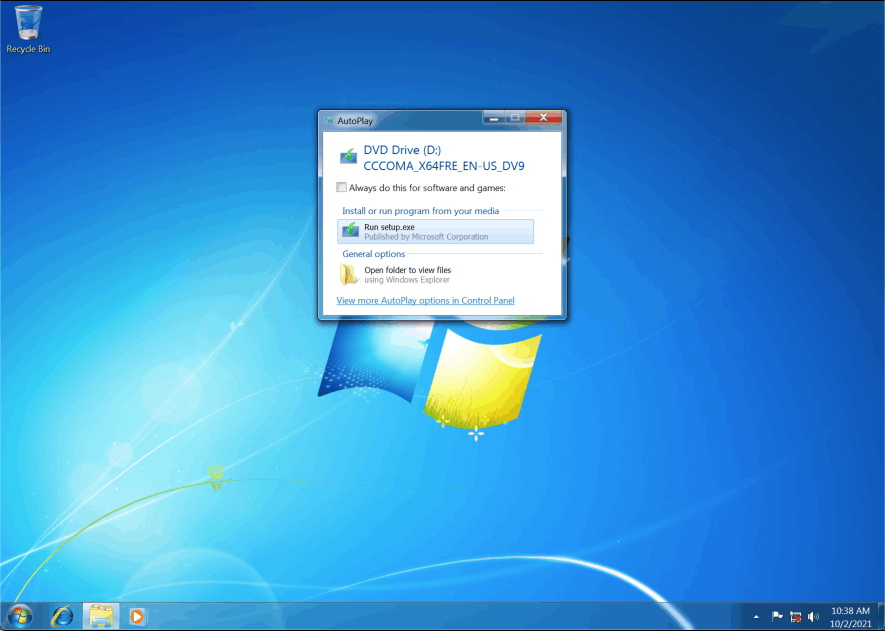
Boot to the Windows 7 desktop. If you are installing from a DVD or USB thumb drive, insert or connect it, then click Run setup.exe. If setup does not start automatically, click Start > Computer > open the drive containing the Windows 11 setup files, then double click Setup.exe.
If you want, you can let Windows 11 setup download files that might help to make your installation successful. Click Next to begin.

Windows 11 setup will run a series of checks to make sure your computer is compatible. Some older Windows 7 PCs might not be able to run Windows 11. Learn how you can check to make sure your device is ready:
How to Check if your Computer or Device is Windows 11 Compatible

If you are prompted to enter a product key, this likely means your current Windows 7 installation is not activated. A Windows 7, Windows 8/8.1 or Windows 10 Product Key cannot be used, even if it's a corresponding edition. Only a Windows 11 product key can be used here. You can first try activating the installation, restart your computer then attempt the upgrade again and you will not be prompted for a key.

Read and accept the End User License Agreement

Windows 7 users should be aware, the upgrade to Windows 11 will only keep personal files. That means your applications and some driver software might need be reinstalled or updated. I highly recommend backing your entire Windows 7 installation just in case you need to go back if Windows 11 does not perform well on your configuration.
How to backup your installation of Windows 7 - Notebooks.com

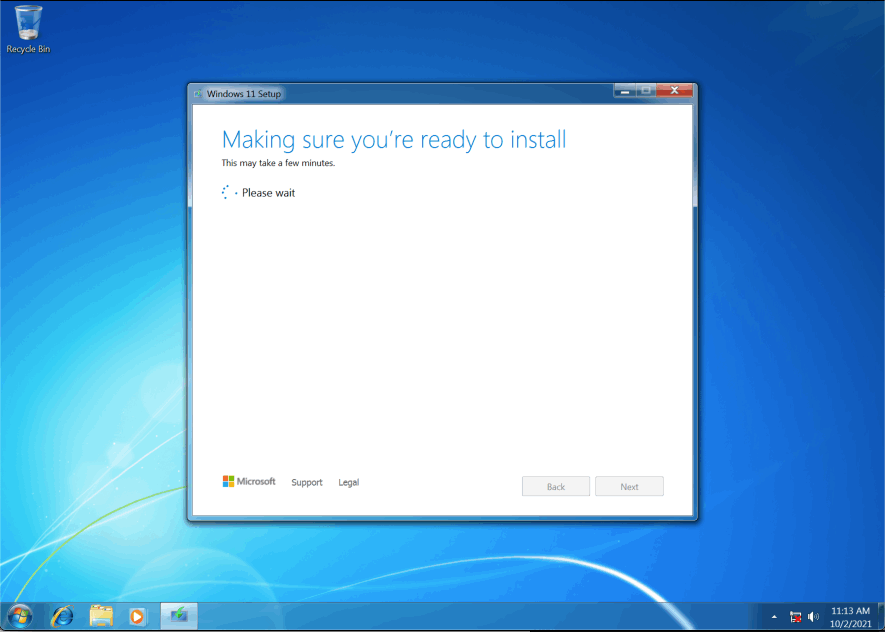
Windows 11 setup will do some last checks
Confirm the changes one last time before you begin the installation. When you are ready, click Install

This will be your screen for a little while. During the installation, your computer will restart several times.

After the first restart, Windows 11 setup will resume.

You will notice the setup experience has once again been refined from the previous animated circle. This will be your screen for a while. When complete, Windows 11 setup will restart automatically.

You will be greeted by the new Windows 11 lock screen

Sign into your account.

Wait while Windows 11 completes application updates and post setup tasks.

Windows 11 OOBE will prompt you configure a few privacy options for your installation.

That’s it, the Windows 11 is installed. You can check Windows Update for latest updates, click Start > Settings > Windows Update > Check for Updates.

If Windows 11 does not perform well on your configuration or it is not to your liking, you always have the option to Rollback your installation before 10 days. If you created a system image prior to upgrading, you can always restore.
Learn more: How to Use The Rollback Function in Windows
Upgrade to Windows 10 from Windows 7
Boot to the Windows 7 desktop. If you are installing from a DVD or USB thumb drive, insert or connect it, then click Run setup.exe. If setup does not start automatically, click Start > Computer > open the drive containing the Windows 10 setup files, then double click Setup.exe.

Click Yes if prompted by the User Account Control dialog.

Wait while setup is initialized.

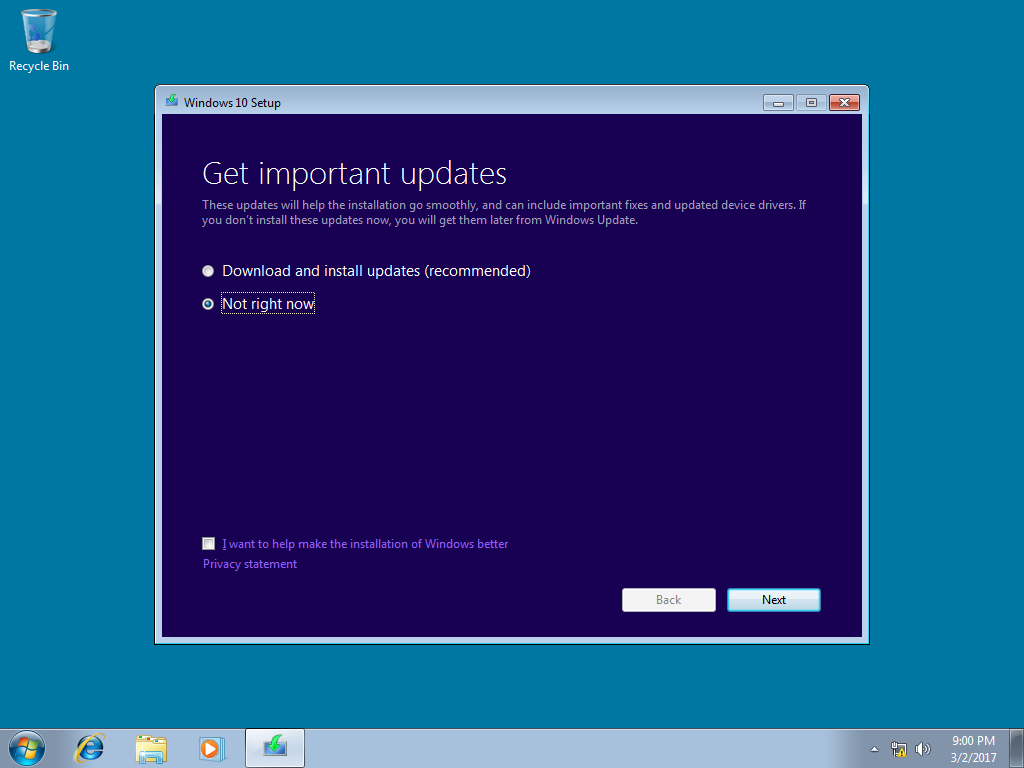
You can select download and install any important updates before upgrading. This is recommended since it can help to ensure a smooth upgrade. If you are not connected to the Internet, select the Not right now radio box instead. Click Next.
Wait while Windows 10 setup checks your system for compatibility issues.

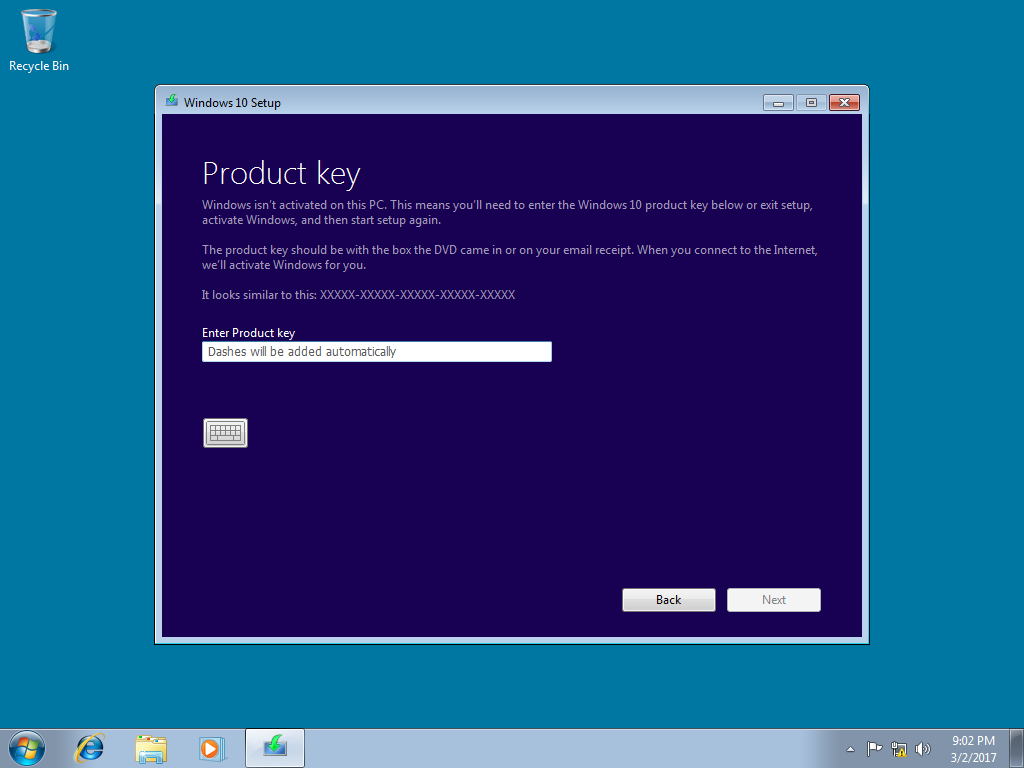
If your Windows 7 installation is not activated, you will need to enter a valid Windows 10 key; a Windows 7 key will not work. If you don't have a valid Windows 10 key, then you will have to boot from the Windows 10 install media (DVD or USB), then perform a clean install, skip when prompted to enter a product key, then activate using your Windows 7 product key after reaching the desktop. If you have your Windows 7 product key, try activating your installation first, then restart setup.
Accept the End User License Agreement.

Wait while Windows 10 setup does one final check to ensure your system is ready.

Windows 10 setup will check if you have enough disk space. If you don’t, review the following article for instructions how to upgrade to Windows 10 Feature Update on a system with limited space:
How to Upgrade to Windows 10 Update on a Drive with Limited Space

Note, you have the option of choosing what you would like to keep, which includes personal files, apps and settings.

If you want to perform a new install or just keep your files click Change what to keep. Once you have chosen the desired options, click Install to begin.
To learn more about performing a clean install: How to: Perform a clean install of Windows 10

This will be your screen for a little while. During the installation, your computer will restart several times.

After the first restart, Windows 10 setup will resume. You will notice the setup experience has once again been refined from the previous animated circle. This will be your screen for a while. When complete, Windows 10 setup will restart automatically.

Users upgrading from Windows 7, will have a few more steps to complete before reaching the desktop. Click Next, to sign in.

Here, you can adjust your privacy settings. This will let you choose what you want Windows 10 to know about you. You can accept the defaults or take your time and review them. Click the toggle button to turn on/off a setting. You can also make changes at anytime after reaching the desktop, click Start > Settings > Privacy.

Cortana is the new digital assistant built into Windows 10 that helps you do all sorts of things like: track package, find information on the web and your PC, find the name of a song playing, tell a joke, create a reminder or schedule an appointment. Cortana is not required, but it makes Windows 10 a unique experience.

Windows 10 comes built in with a new generation of programs called universal apps. These apps can do many things like manage your images (Photos); buy, listen and stream music (Groove); buy, watch, TV and movies (Movies & TV); browse the web safely, ask questions, write on web pages and enhance with extensions (Edge). You can change the defaults here and anytime in Windows 10. Click Next to continue.

Sign into your account.

Wait while Windows 10 completes application updates and post setup tasks.

That’s it, the Windows 10 Feature Update is installed.You can check Windows Update for latest updates, click Start > Settings > Update & security > Windows Update > Check for Updates.

How to prepare your computer before upgrading?
Although updating to a new Windows 10 version is a relatively simple process, similar to a repair upgrade; users should perform some basic pre-requisites before initiating the upgrade.
If you are finding it difficult to carry out some of the steps described below, please review detailed instructions how to perform them:
12 Things You Should Do Before Installing Windows 10
When making significant changes to your computer such as updating the operating system, you should always backup.
How to: Create a system image in Windows 7
Disable (preferrably uninstall) your Antivirus utility before attempting the upgrade.
Restart a few times then try again.
Disable General USB Devices (example - Smart Card Reader). You can do this from the Device Manager.
If you have any external devices attached to the machine, disconnect them (example, gaming controllers, USB keys, external hard disk, printers, non-essential devices).
Load your BIOS the reset the BIOS defaults.
Check if there are any available BIOS updates for your system, then apply them.
Perform a clean boot, restart then try again.
If you are upgrading using the .ISO file, disconnect from the Internet during setup, if you are connected by LAN (Ethernet) or Wi-Fi, disable both then attempt setup again.
If you are updating through Windows Update, when the download reaches 100% disconnect from the Internet LAN (Ethernet) or Wi-Fi then proceed with the installation.
If that does not work, try using the .ISO file to upgrade if possible.
If you are connected to a domain, switch to a local account or upgrade based on your System Administrators discretion.


 - Complete Windows 10 media To HP V2.50 8GB> Click Start> Click
Power> Click Restart
- Complete Windows 10 media To HP V2.50 8GB> Click Start> Click
Power> Click Restart