
Technical Level : Basic
Update: Starting with Windows 10 Creators Update and later versions, Windows Defender has been succeeded by a new security client called Windows Defender Security Center. Windows Defender Security Center includes a suite of protection tools for your Windows 10 device, these include: Antivirus, Performance, Firewall, App and Browser Control and Family Safety.
This also means, users don't need uninstall third party Antivirus products compatible with Windows 10. Third party Antivirus utilities can co-exist with Windows Defender Security Center just fine. If you are running an older release of Windows 10, such as 1607 and earlier, you can follow the instructions below for enabling your third party Antivirus utility.

Summary - Enabling Windows Defender on Older Releases of Windows 10
Windows 10 might require a new version of your Antivirus designed for Windows 10. If you have a subscription that has not expired, contact the developer to find out about Windows 10 support. Most Antivirus utilities should now support Windows 10. If your subscription is still active, then you should be entitled to a compatible update for Windows 10. If your current Antivirus is incompatible with Windows 10 or you do not plan to renew your subscription, you can use the built in Windows Defender or Windows Defender Security Center as an alternative. Lets take a quick look at enabling and updating Windows Defender.
Details
Press Windows key + X

Click Programs and Features

Select the Antivirus utility you have installed, then click Uninstall/Change. You might have a different one installed, I have Norton for example.

This will launch the setup wizard which will guide you through uninstalling your Antivirus. Follow the on screen instructions, a reboot might be required.

During the uninstallation, you might receive a notification indicating virus protection is turned off. You can use this opportunity to enable Windows Defender right away. If not, follow the next steps to enable it yourself manually.
Click Start
Click Settings or press Windows key + i
Click Click Update & Security
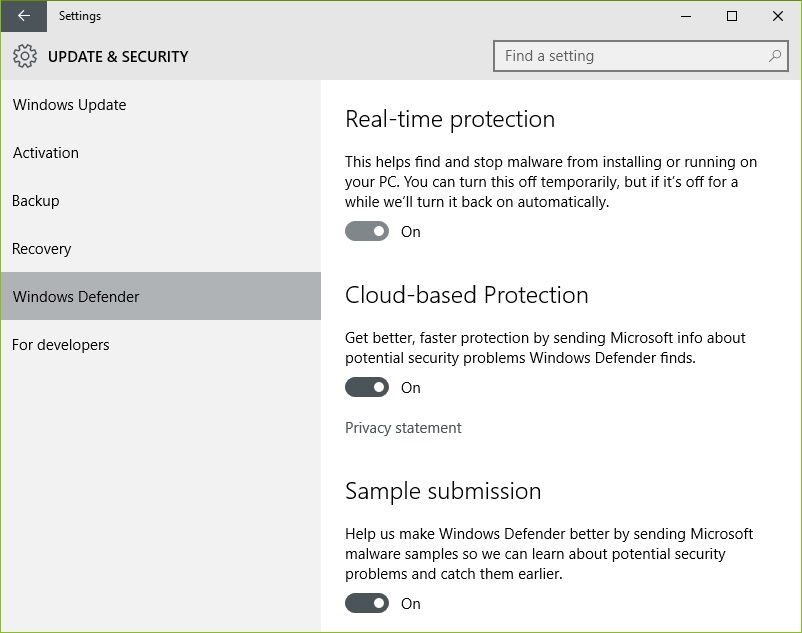
Click Windows Defender
Make sure Real-time protection is enabled
Windows Defender should automatically turn on and prompt you update. Do so right away, as the definitions tend to be out of date by many months or years (depending on when you install Windows 10).

That’s it, you now have a free built in Antivirus utility you don’t have to pay for.
Resources:
Windows 10 Creators Update Feature: Windows Defender Security Center Manually Install Standalone and Cumulative Updates and Virus Definitions in Windows 10 How to Increase Windows 10 Defender Cloud Protection ... - groovyPost