Ha!
I got it working :-)
All I did was more googling...
It turns out that the Intel HD driver usually comes with the opportunity to add custom resolutions. In the previous versions they have had a button for entering this mode. This is not the case for this version - the button/menu is not there but the application
remains :-)
Thus, update to the latest Intel HD 4000 driver for Windows 10 and click on your "search windows" and type: "CustomModeApp":
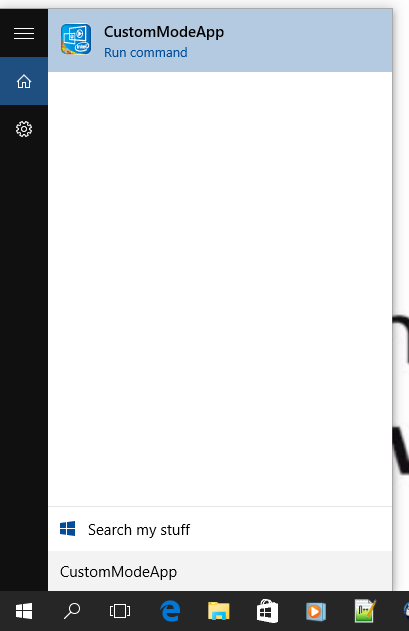
Right click the search result and select: "Run as administrator".
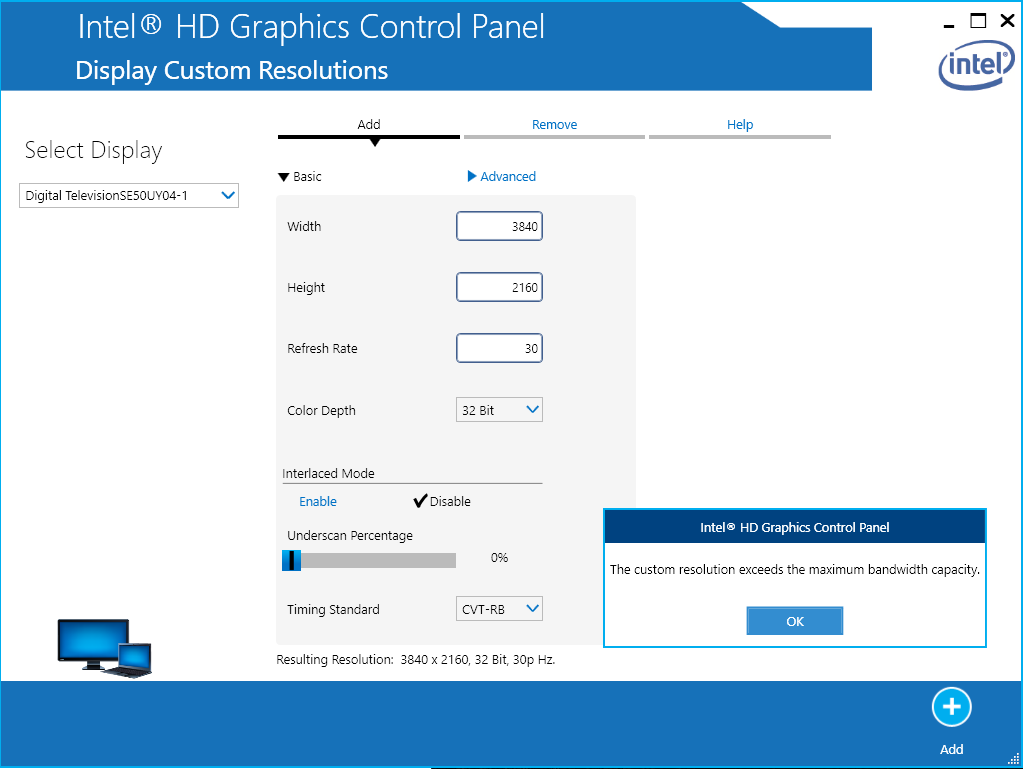
The Intel custom mode application will now open:

*NOTE*: You have to select the right monitor in the upper left corner!
Now, I entered 3840 for "Bredde" (Width in Danish) and 2160 for "Højde" (Height in Danish). I set "opdateringshastighed" (Frequency) to 30 but it ended up setting it to 29 by it self. I chose the CVT-RB as the timing standard.
Then I went to the Intel display configuraiton center and selected the newly added mode - and boom 4K on windows 10 with intel HD 4000 :-)
*UPDATE*: I have some problems making the chosen custom resolution sticky. Does anyone know how to do this?