Windows 10 insall media not able to install

After a failed pc reset i tried burning the windows install media to a disk and putting it into my computer. I tried installing it custom but it didn't let me install it to my drive saying it can only be installed d to a GPT disk.

Answer
Answer

Hi Marc,

Thank you for posting in Microsoft Community.

To understand the issue better, I suggest you to answer the below question.

  1. How many partitions are you using in hard drive?
  2. Which was the previous operating system before upgrading it to Windows 10?

Master boot record (MBR) disks use the standard BIOS partition table.

GUID partition table (GPT) disks use unified extensible firmware interface (UEFI). MBR disks do not support more than four partitions on each disk.

All 64-bit versions of PCs running Windows with a logo from the Windows Certification Program will use UEFI instead of BIOS. To learn more about your PC's support of UEFI, see the product info that came with your PC.

I would suggest you to use the same media disk and Disable the secure boot options in UEFI firmware setting.

  • When your computer starts, wait for the manufacturer logo to check the option for boot menu, it will usually be F12.
  • The boot menu key might differ with each manufacturer. If you are unable to find the boot menu key, you may refer the user manual.
  • Restart the computer, when the manufacturer's logo is displayed, keep pressing the Boot menu option key to enter the boot menu and change the boot option to CD\DVD ROM.
  • After you boot your computer using Windows DVD or System Repair Disc, a black screen appears with gray text "Press any key to boot from CD or DVD". Press any key.
  • Select the correct time and Keyboard type.
  • Click Repair your computer in the lower left corner.
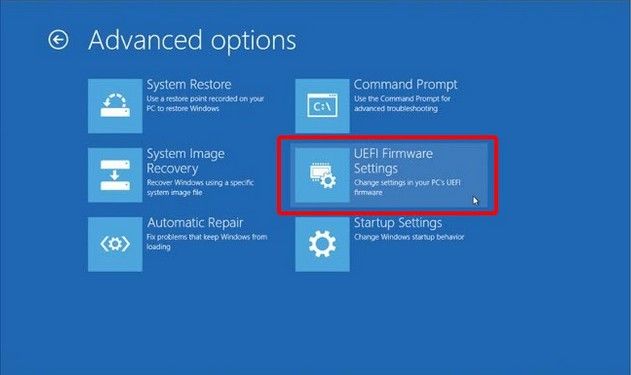
  • Now you will be presented with the Chose an option screen. Simply select Troubleshoot and then Advanced options in Troubleshoot.


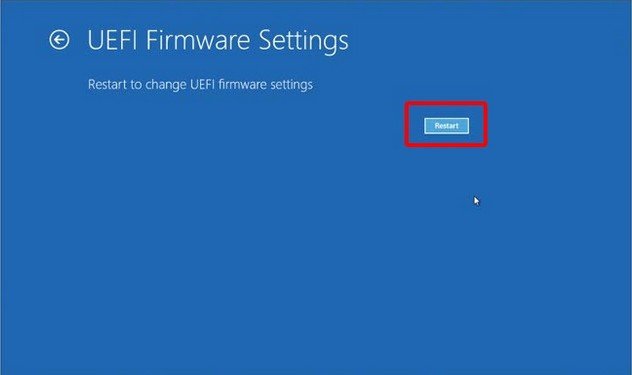
  • In Advanced options menu, choose UEFI Firmware settings. Then click on Restart button to reboot your system in UEFI settings.


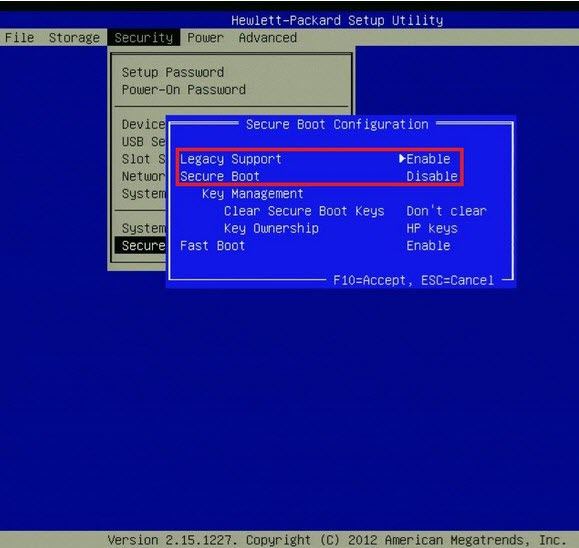
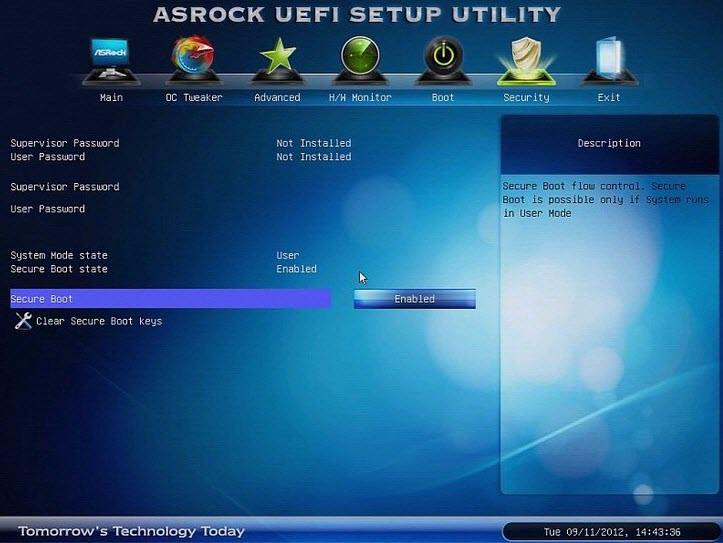
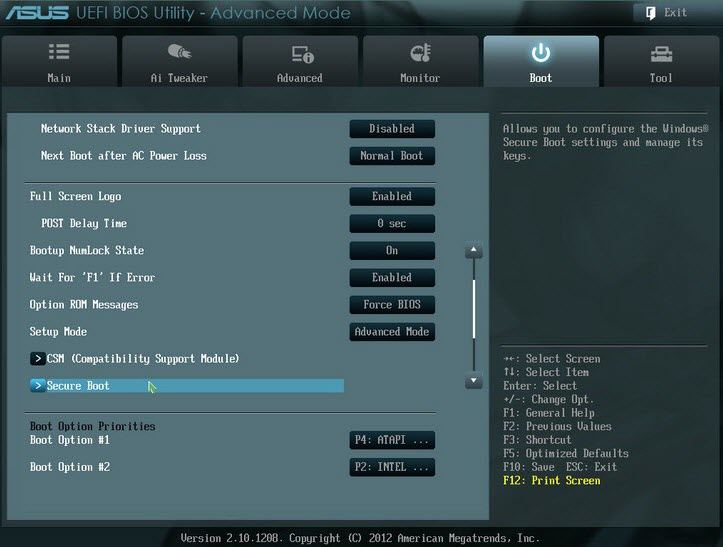
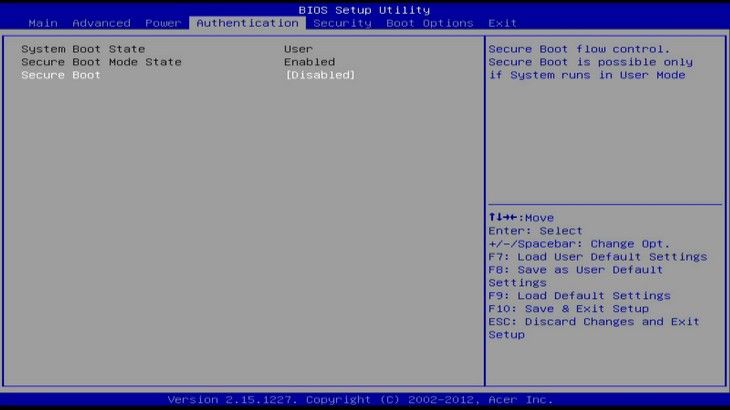
  • Now your PC have been booted into UEFI utility, move to boot on the top menu and here you can see the option to disable secure boot. Use the arrow key to go to Secure Boot option and then press enter to select it. Use + or – to change its value.

    Note: Depending on the motherboard's BIOS/EFI firmware, the Secure Boot option will be found on the "Boot", "Security", or "Authentication" page.

    HP Secure Boot


    ASRock Secure Boot


    ASUS Secure Boot


    Acer Secure Boot

  • Press F10 to save the changes and exit the UEFI settings.

Keep us posted to help you better.

Thank you
Sachin.V
Microsoft Community

Was this reply helpful?

Sorry this didn't help.

Great! Thanks for your feedback.

How satisfied are you with this reply?

Thanks for your feedback, it helps us improve the site.

How satisfied are you with this reply?

Thanks for your feedback.


Question Info


Last updated July 16, 2020 Views 73 Applies to: